
How to Update a Bathroom Without Renovating
Have a dated bathroom that needs an update, but don’t have the budget? I’m here to help with a roundup of my best ideas for updating a bathroom without a renovation!
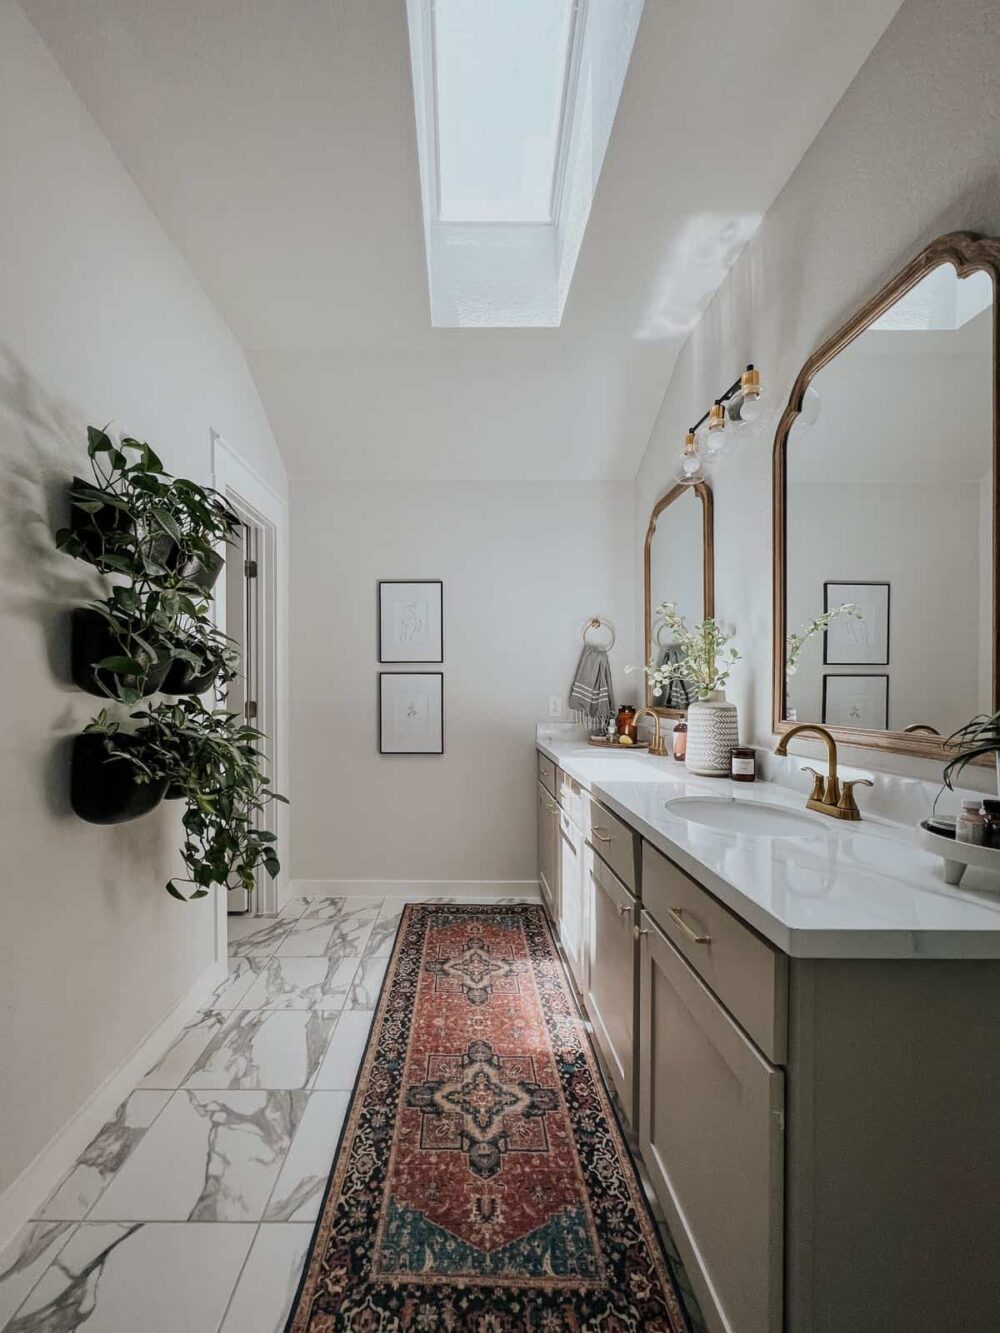
For a lot of people, the bathroom is one of the most intimidating spaces to tackle in your house. Along with the kitchen, it can often feel like a space that isn’t really worth working on unless you can fully renovate it. But, I’m here to prove that isn’t true. In fact, I’ve done mini, non-renovation makeovers in bathrooms faaaaar more often than I’ve done big gut jobs!
I’m getting ready to do some simple updates in one of the bathrooms at our home, so I wanted to compile this little list for you to prove that a bathroom update doesn’t have to be complicated or expensive. With a little patience and a paintbrush you can do a LOT with a very little budget!
Can You Update a Bathroom on a Budget?
First up, let’s definitively answer the question of if this is even possible. Because, I think when most people hear “updating a bathroom without a renovation” they’re picturing pretty minor changes. Nothing dramatic. No big before and afters.
Well, I am here to prove that wrong! In fact, let me show you just two of the bathrooms I’ve totally transformed without any demo or huge projects.
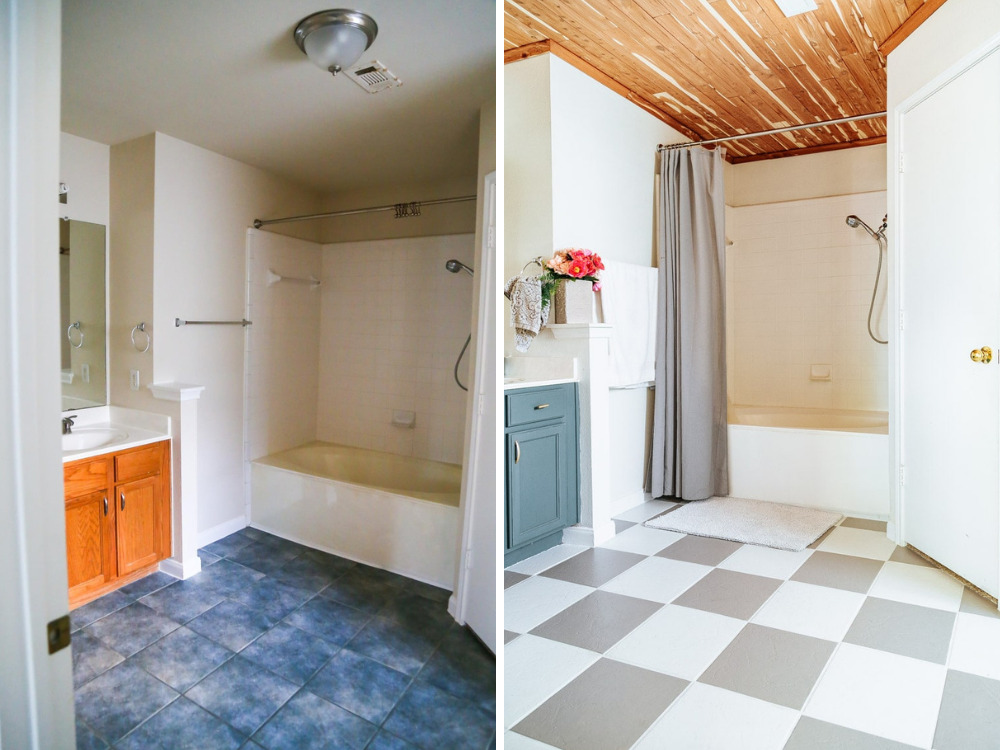
Get the details on this bathroom transformation here.
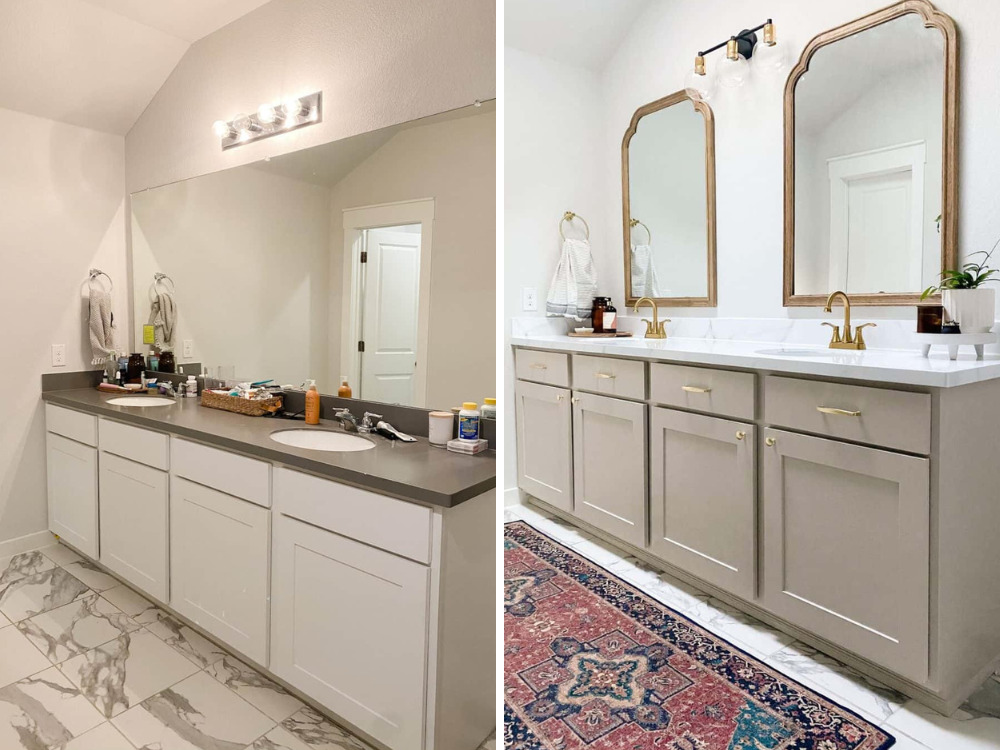
Get the details on this bathroom here!
Do you believe me now? You absolutely do not need a huge budget, a long timeline, or a ton of DIY know-how to make your bathroom look incredible. I always like to remind you that the little projects reeeeally add up and this is no exception!
So, let’s talk about how to make this happen – here are a few of my favorite no-demo-needed projects for the bathroom that will keep you in-budget but give the space a new life.
10 Ways to Update a Bathroom Without Renovating
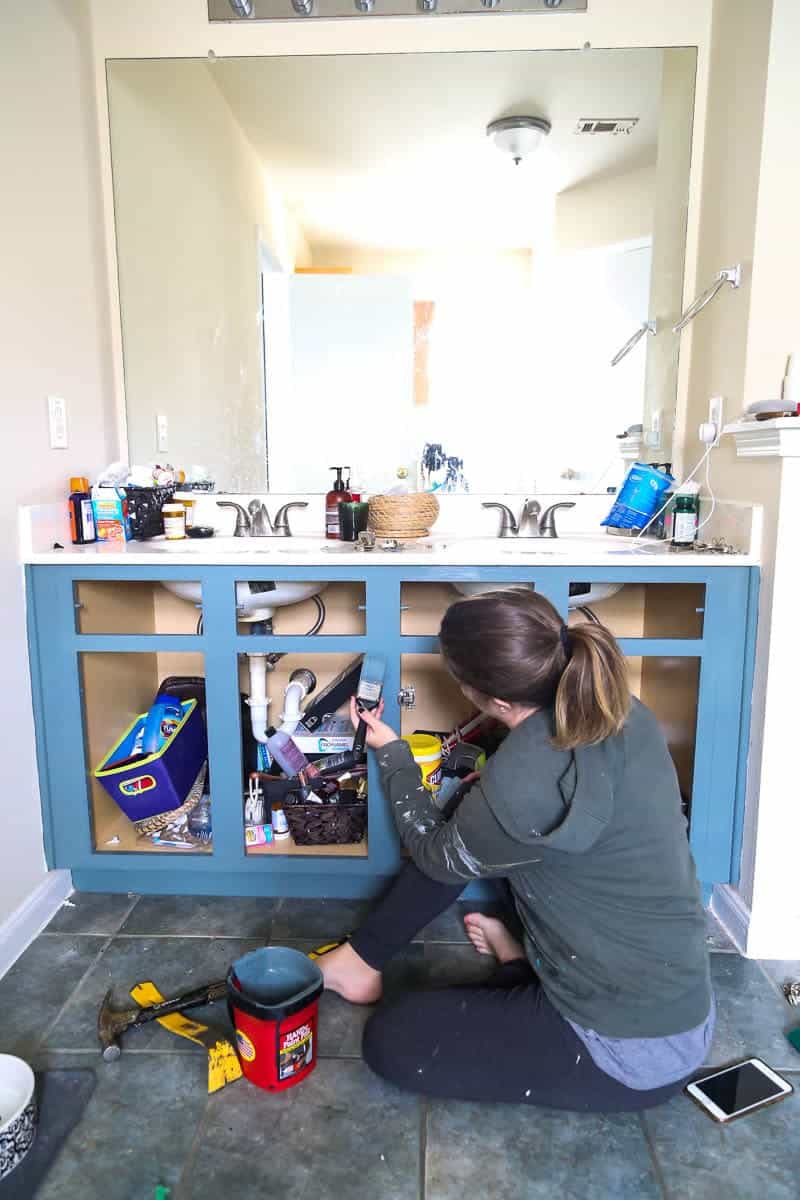
Paint the Vanity
Paint is always one of the simplest ways to make a huge impact in any space, and the bathroom is no exception. If you’ve got a vanity that doesn’t fit the vibe you want for your space, painting it is a super affordable and easy way to transform the whole bathroom in an afternoon.
I’ve done this in every single house we’ve lived in so far!
- In our first house, I painted our vanity a bright coral.
- In our second home, I used a cabinet painting kit our our bathroom vanity.
- And in our last house, I painted our (laminate) bathroom cabinets a gorgeous taupe.
And that doesn’t even take into account the secondary bathrooms where I painted vanities (there were several of those, too)!
All that to say – this is a quick and easy weekend project with a huge payoff. The process will vary slightly depending on what you’re starting with (painted vs. stained, real wood vs. laminate), but no matter what you do it’s worth the effort!
Paint the Countertops
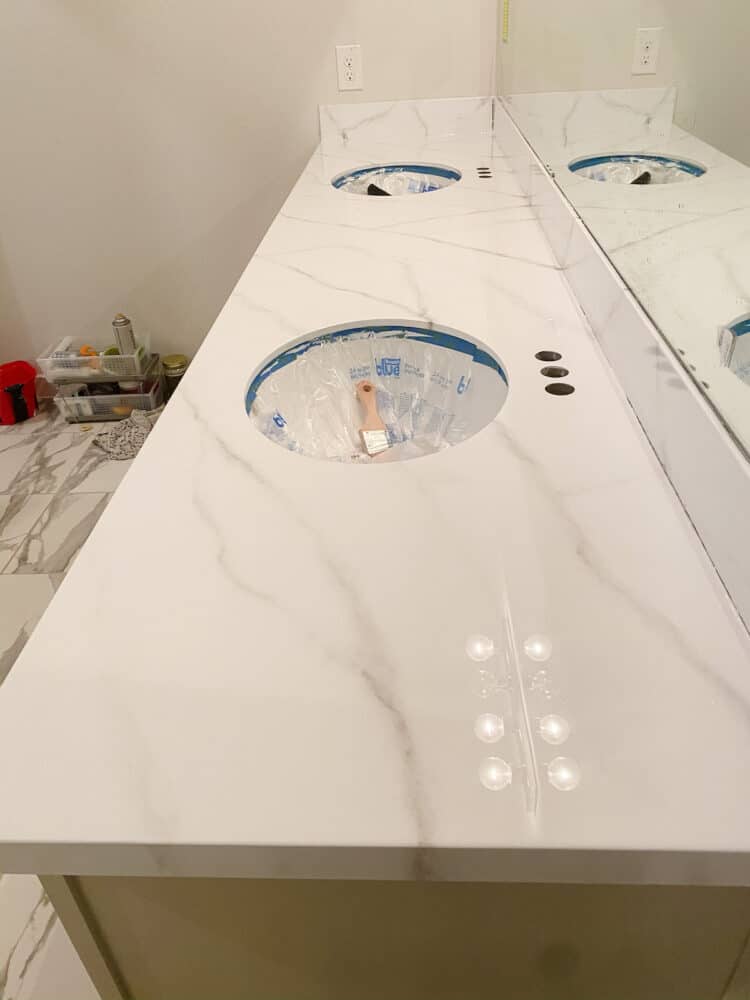
This is perhaps one of my more controversial projects but it also happens to be one of my FAVORITES! I absolutely hated the gray solid surface countertops in our last house but we didn’t have the budget to replace them. So, I grabbed this $200 epoxy kit and I was able to paint the countertops in both our bathroom and the boys’ bathroom with one kit! You can see the full tutorial here.
It’s highly intimidating, I know, but I promise this project isn’t nearly as scary as it looks. It’s really fun and satisfying, and the finished result is pretty incredible (and so realistic!).
I wouldn’t recommend this project as a permanent solution – after 3-4 years of daily use on our bathroom counters they were starting to chip in the most-used spots. But, it’s a really fantastic “phase one” makeover and you truly can’t beat the price. I think the counters at our last house would have held up for at least 2-3 more years (giving them a solid 5-7 years of use) before they really needed to be replaced. That is a great in-between measure while you save up for a full replacement!
Get Creative With the Ceiling
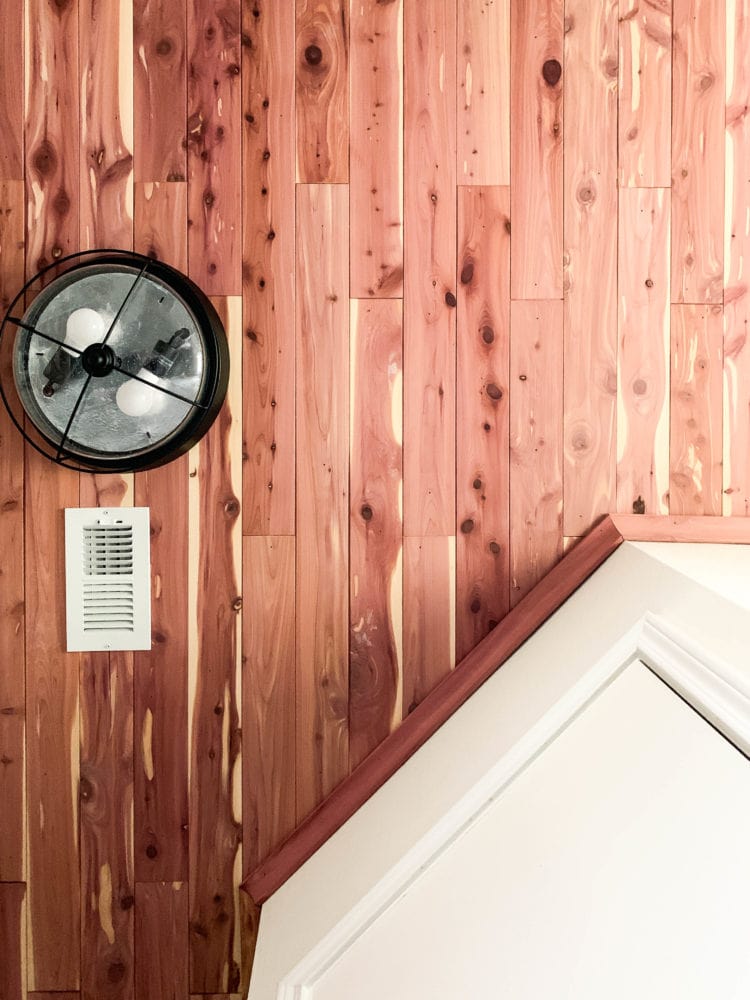
I added cedar planking to the vaulted ceiling in our first house and I fell so head over heels in love with the look. It was so cozy and welcoming and truly made the bathroom feel like a spa. I loved it so much, in fact, that I did it again at our second house! Heck, I even planned on doing it at our last home, but we moved before I got around to it.
I got a ton of questions about if this is safe – will the wood mildew over time or trap moisture? I’m not a professional, but here’s my take: as long as you have proper ventilation in the bathroom, you’re totally fine. Cedar is a moisture-resistant wood (I wouldn’t do this with pine, for example) and holds up great in humid environments. As long as you aren’t trapping moisture in the bathroom all day every day, you shouldn’t have a problem. We didn’t have any issues with ours in the years we lived in those houses, and I would absolutely do it again!
This is a slightly more expensive project (depending on the size of your bathroom), simply because wood is pricey. But it’ll have a major impact, and it’s really easy to do. You can grab the same cedar planking I used here, if you want to give it a shot!
Cedar ceiling isn’t for you? I’ve also done a shiplap ceiling in a bathroom, and shared a ton of other ceiling ideas here!
Paint the Bathtub
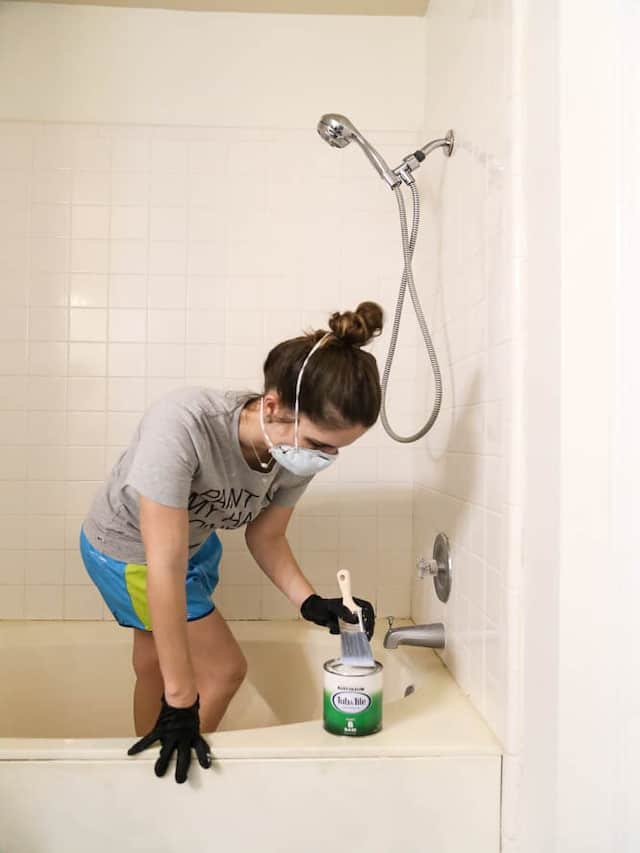
Y’all, if you have a bathtub or shower surround that makes you cringe every day, this is a MAJOR game-changer. In fact, this project landed me on The Rachael Ray Show back in the day!
This tub and tile paint works wonders to cover up dated tile, ugly bathtubs, and shower surrounds. Our shower wasn’t a crazy color, but it was an off-white that made it look really dingy and dirty all the time. I painted it with this stuff and suddenly it looked fresh and clean and modern!
You can see the full tutorial here. I’ll warn you that it is a very stinky project and requires really great ventilation. Maybe plan to do it right before you leave town for a weekend. But it’s an incredibly budget-friendly way to refresh your bathtub without any demo, and you’ll be amazed at how much better it looks afterwards.
Swap the Faucets + Hardware
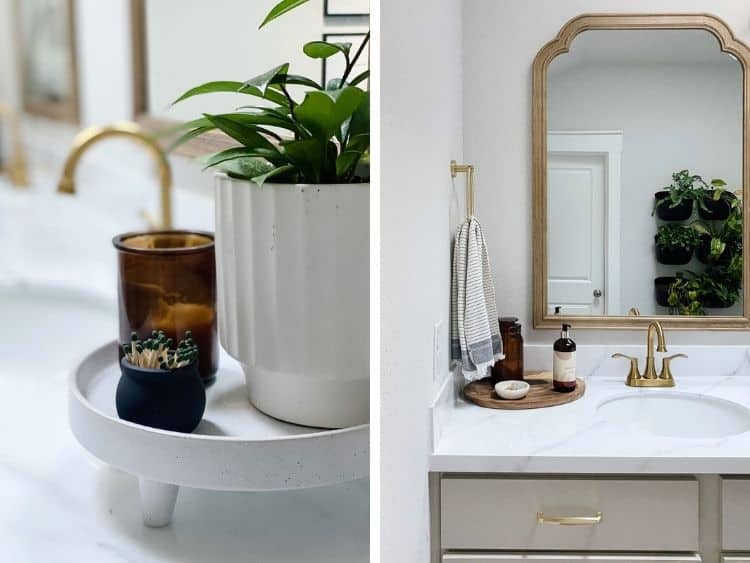
One of the easiest and most affordable things you can do to refresh your bathroom is swap out the hardware. A new bathroom faucet can update a vanity instantly, as can new cabinet and drawer pulls! If you really want to go crazy, swap out the mirrors too.
This is something I recommend for pretty much any bathroom refresh. The little details really do make a difference, and this is such an easy change. If you want to take it all the way and change out your shower head and bathtub faucet too, that’ll make an even bigger difference! But truly, just the little things can go a lonnnng way. A few posts you might find helpful here:
- How to add hardware to cabinets without pulls
- Consider adding a fancy doorknob!
- I loved having a little sign on our powder room door at the last house.
- Here’s a roundup of some of my favorite affordable bathroom hardware.
Add Wallpaper
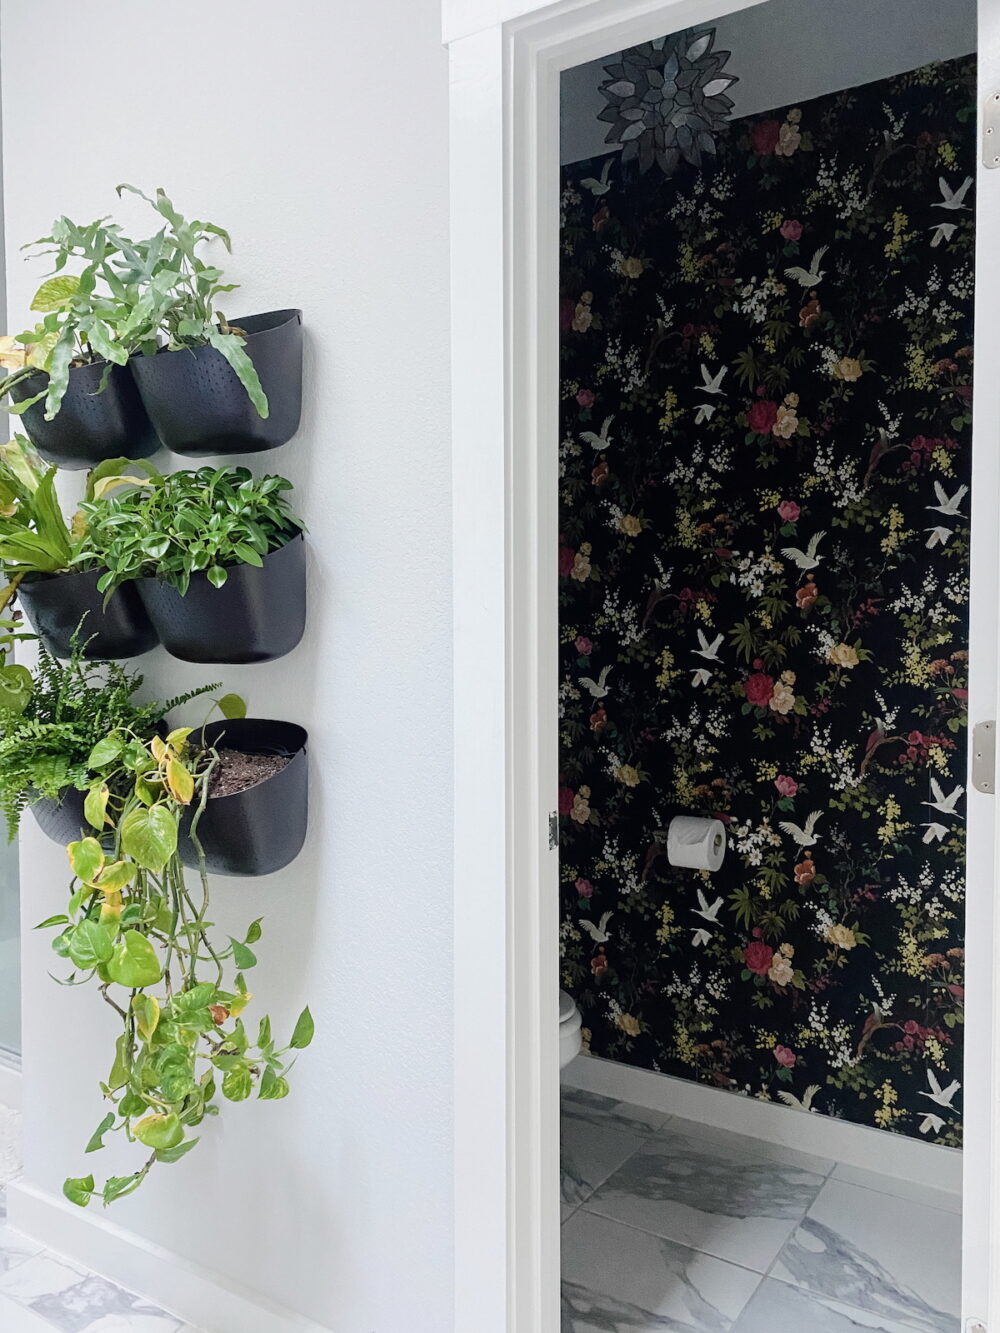
Wallpaper isn’t for everyone, or for every space, but man it sure is fun! I added a really bold floral wallpaper to the water closet in the primary bathroom at our last house, and it was one of my favorite details. Wallpaper can get finicky if installed too close to a shower that’s used all the time – so I’d recommend sticking to areas away from the shower, or in a less-used bathroom. That being said, all three bathrooms at our current house are covered in wallpaper that has clearly been there for decades and it’s held up fine. So, you know, do with that what you will!
I think sometimes people still view wallpaper as a dated (or potentially trendy) choice, but if you love it, you won’t get tired of it. I think it’s particularly fun to choose a really bold or unique wallpaper for a small powder room!
Add Trim
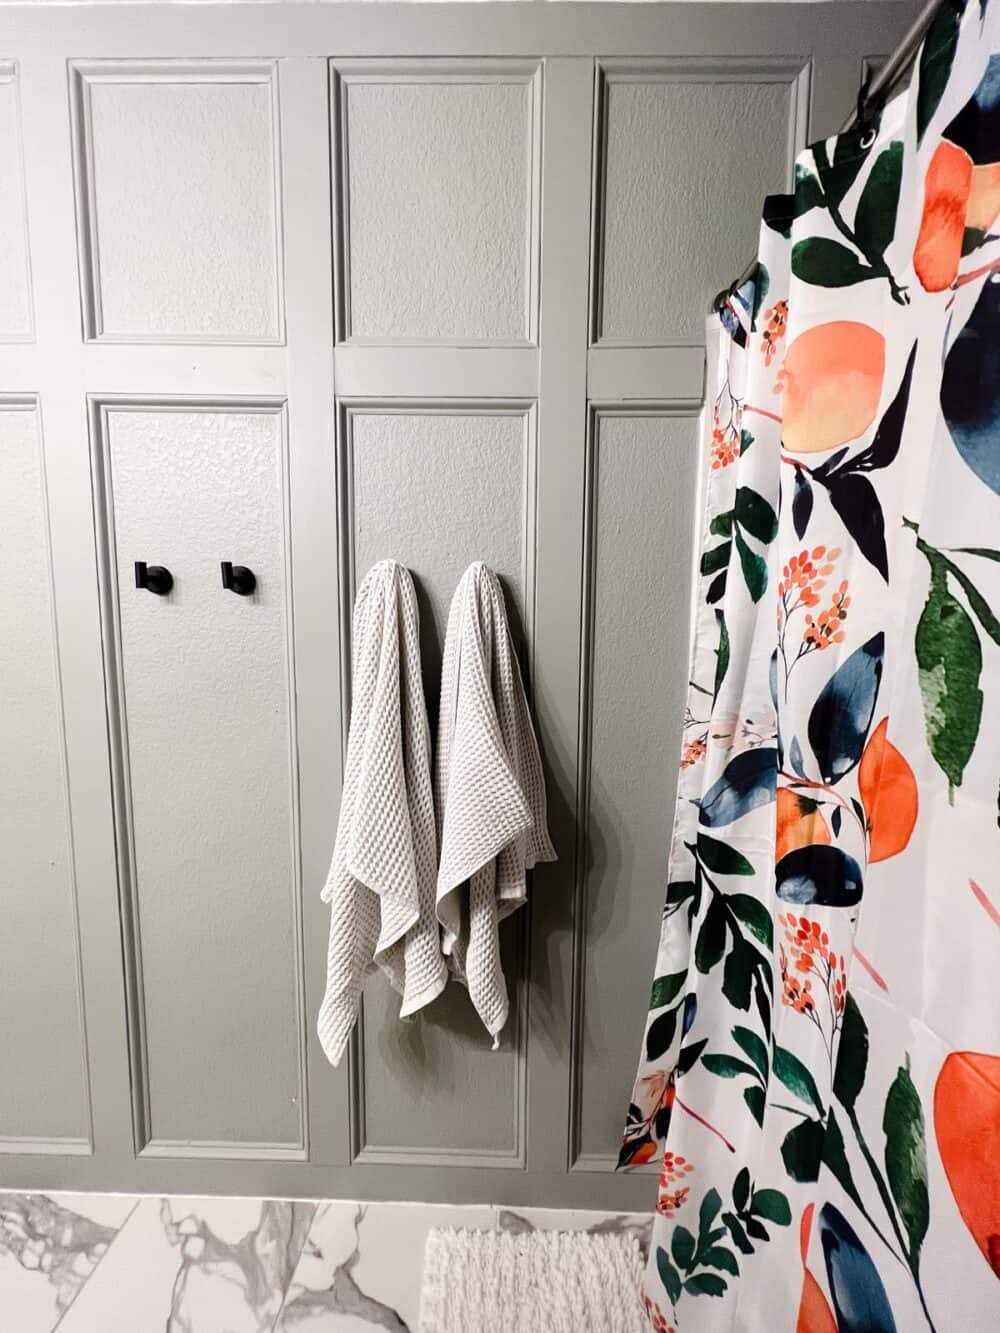
My constant refrain for how to make any space feel more special is to add trim! I think just about every single room in your house can benefit from a good trim treatment, and the bathroom is no exception.
Adding wall trim might feel like something a beginner can’t do, but I promise it’s super simple. I’ve done about a bajillion different trim treatments over the years, but you can see some highlights and get inspired right here!
As for bathroom specific projects, I added black beadboard in one house, a board + batten style wall in our last house, and picture frame molding in our powder room! I fully intend to do trim in pretty much every room in our current house so just stay tuned for more ideas.
Paint the Tile Floor
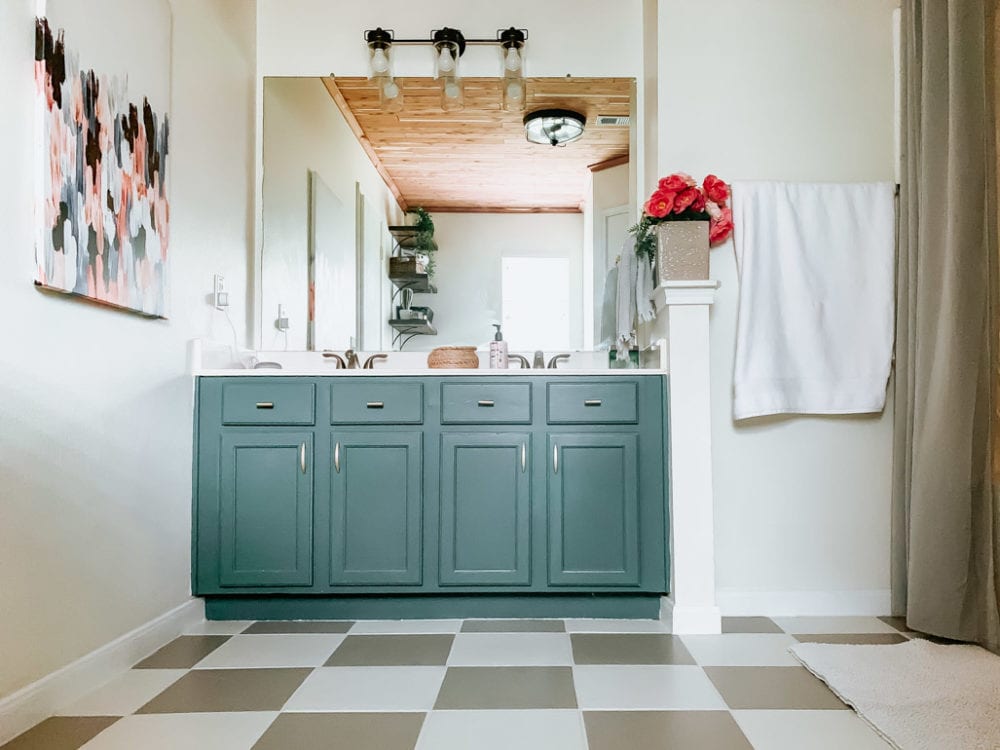
If you hate your ugly tile floor, painting it is a really affordable option! One caveat I’ll give is that white painted floors get dirty FAST! So, if you’re going to go this route, I recommend sticking with darker colors. Or, only use white in bathrooms that don’t get used on the daily!
This was a really fun project that I took on at one of our houses because the tile floor was not working for me and I couldn’t afford to rip it out and start fresh. It just took a couple of days from start to finish and it transformed the entire space in a really major way. I would 100% do this again (and have debated doing it in my current house).
Another alternative is to try peel and stick floor tiles, if you want something a little more foolproof (but also a little more expensive!). I haven’t used it before but I’m seriously considering trying it in a few spots at this house, so I guess I’ll keep you posted!
Frame the Mirror
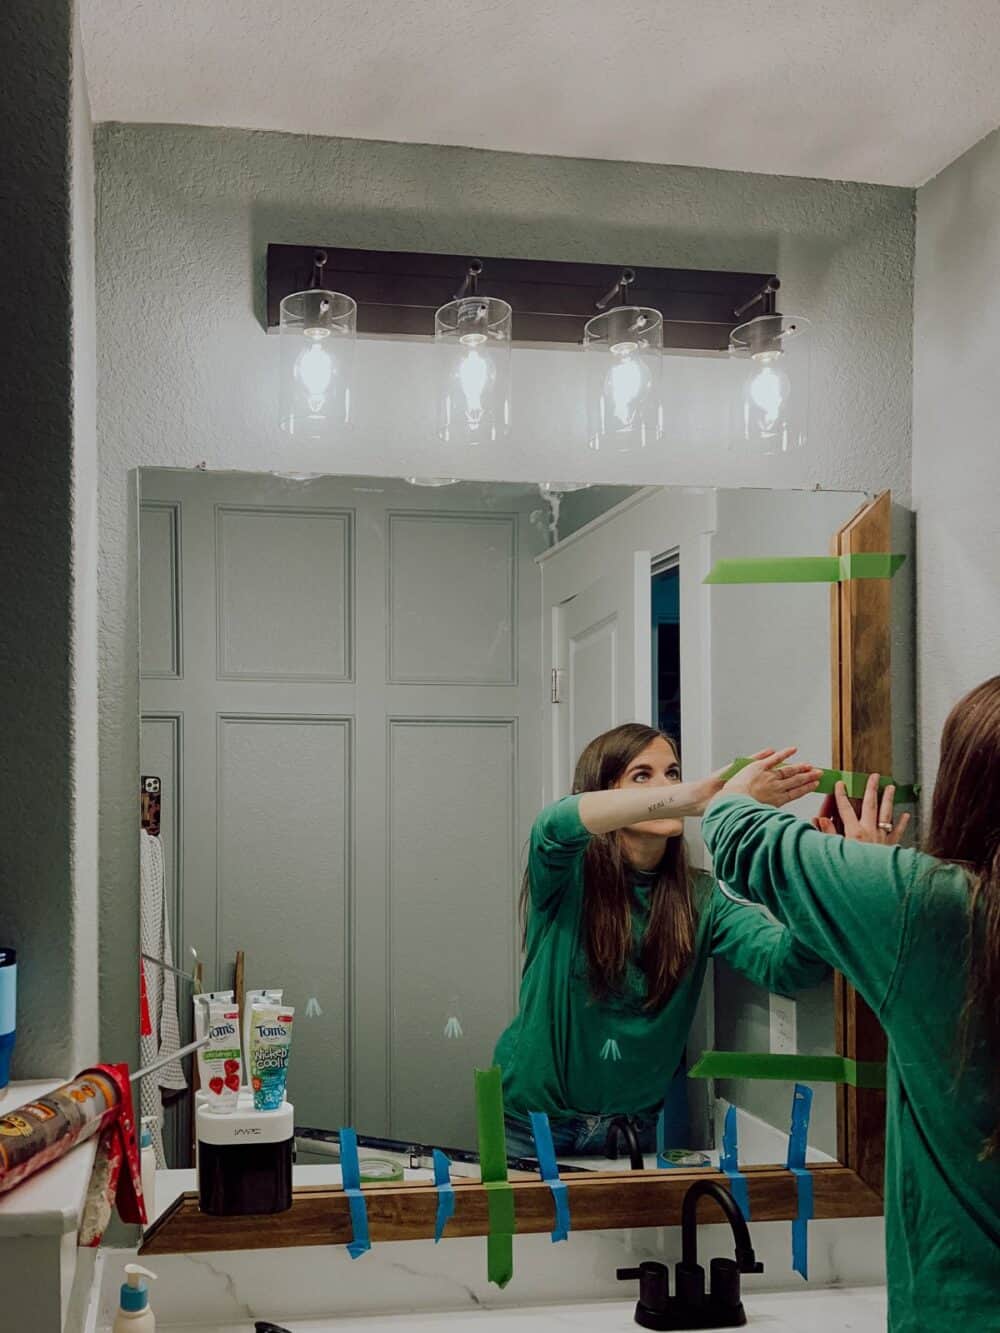
Have a boring builder-grade mirror? You can frame it for less than $50 in an afternoon! This will instantly add so much customization to your space and is a really great beginner-friendly project. I’ve done it in two houses and I’d do it over and over again.
Maybe you don’t have one of those builder grade mirrors but yours is still ugly or doesn’t work for the space. Try replacing it, or even just giving the frame of it a little makeover. The mirror is a huge part of a bathroom, so making it something you love will go a long way!
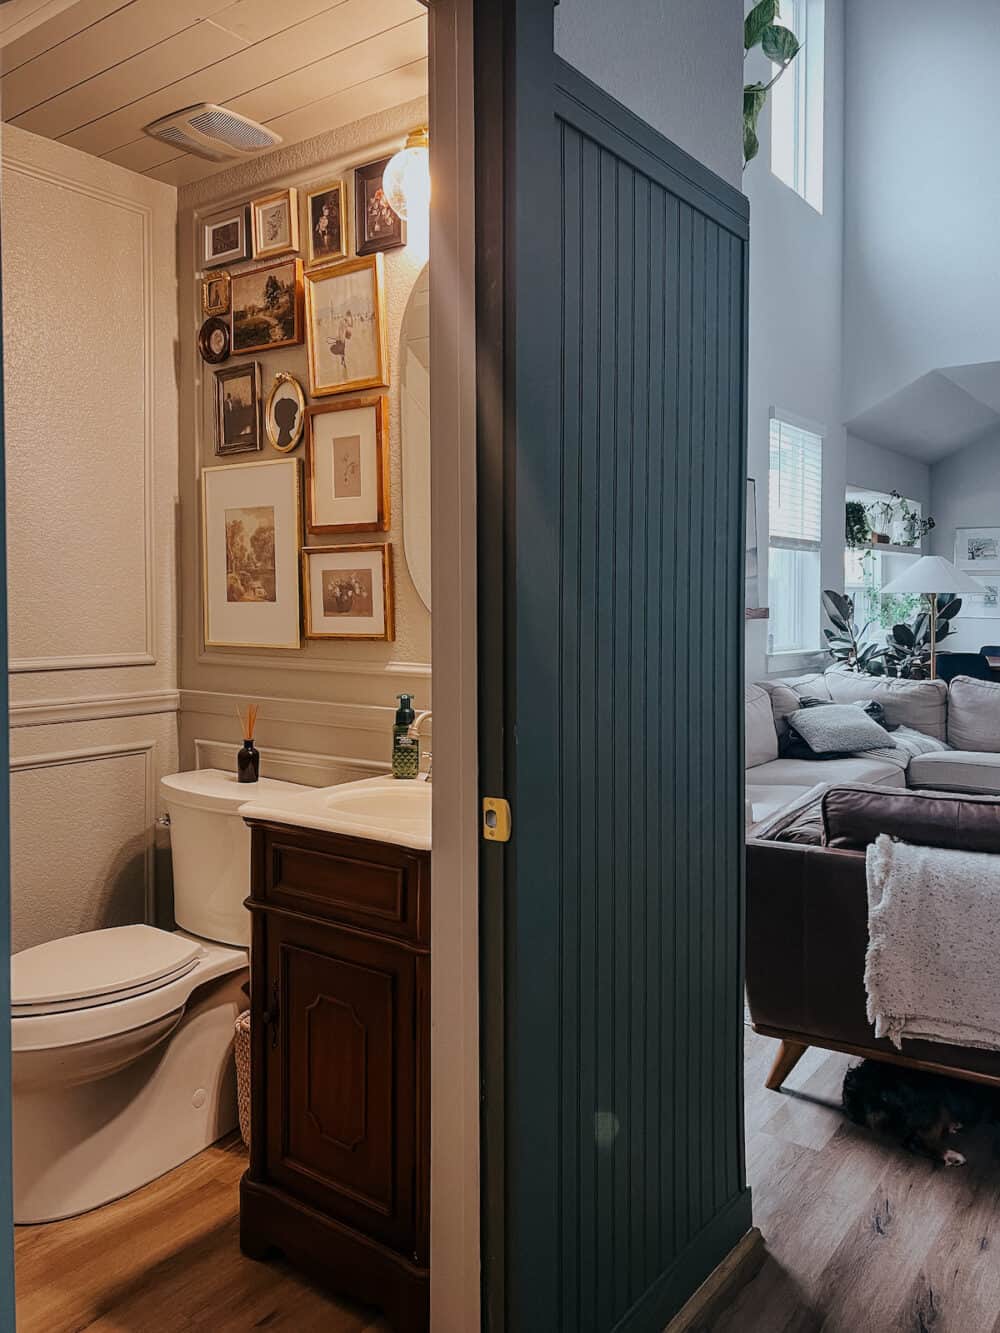
Accessorize!
And finally, the simplest way to make a difference in your bathroom. But also, perhaps, one of the most impactful. I think we often fail to appreciate how much can be done in a room with nothing but accessories!
Things like art, soap dispensers, great towels, and a cute rug can take a boring bathroom and make it look cozy and welcoming in minutes. Often, we feel like we should wait until we’ve renovated a space before we take the time to zhuzh it up, but I think that’s silly! If you can take the space you currently have and love it a little more with nothing but an afternoon and a little shopping trip, why wouldn’t you?!
Try adding unexpected elements like a lamp, a plant if you’ve got natural light, and some really quirky art and you’re well on your way to a bathroom that you love without changing one single permanent fixture!
I don’t know about you, but I”m feeling really inspired and excited to get started on my little bathroom makeover now! I’m getting ready to dive into making my boys’ bathroom (also our guest bathroom) look like a whole new space on a MAJOR budget. Be sure to check back to see how it goes!