
Exterior Spaces: Before & After
Last updated on February 28th, 2023 at 07:41 pm
Corey and I are currently packing up and moving into our new home. While we’re busy over the next couple of weeks, I’m sharing a look back at our first home throughout the years. You can go back and see the living room, the dining room, the kitchen, the master bedroom, the extra bedrooms, and the bathrooms.
Well, here we are. We’ve reached the very last post in our series looking back at our home over the last 6 years that we’ve lived here. I can’t believe how different the house looks, and I absolutely loved putting these posts together to show you the evolution.
Today, we’re going to be taking a look back at all of the exterior spaces in our home – the backyard, the garage, and the workshop. And once we’re done looking at those, we’ll be finished talking about this house, and ready to move onto the next.
Crazy, isn’t it?
Let’s dive right in!
The Exterior – Before & After
This post contains affiliate links. Click here to read my full disclosure policy.
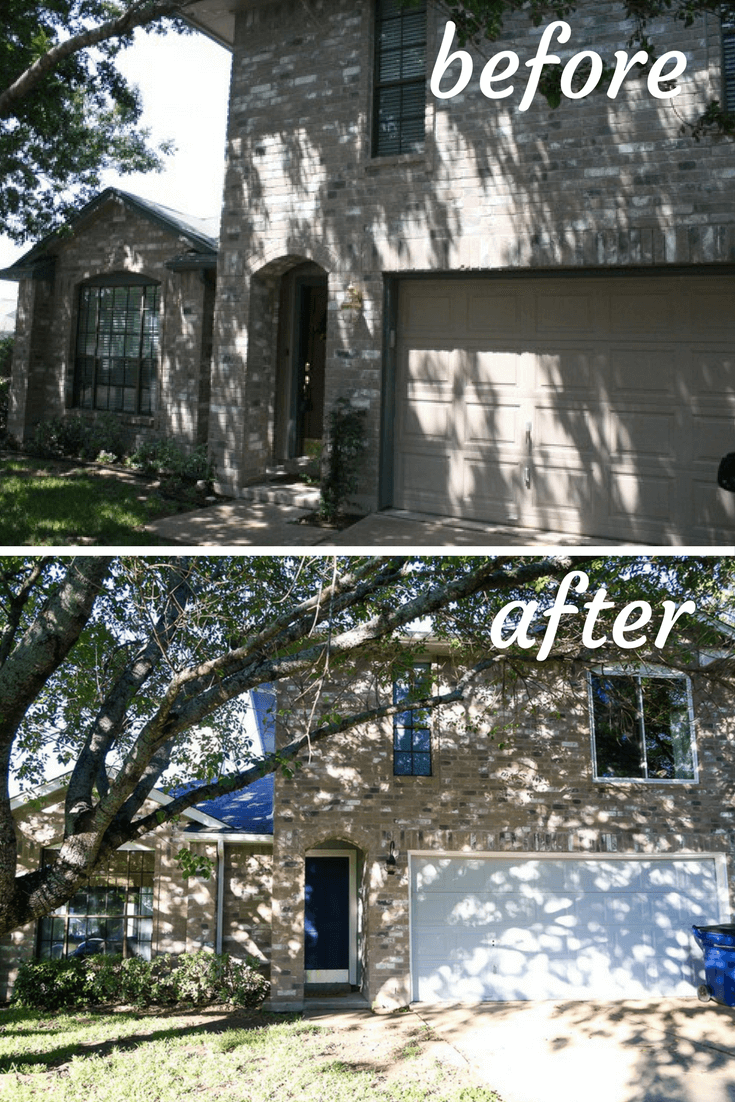
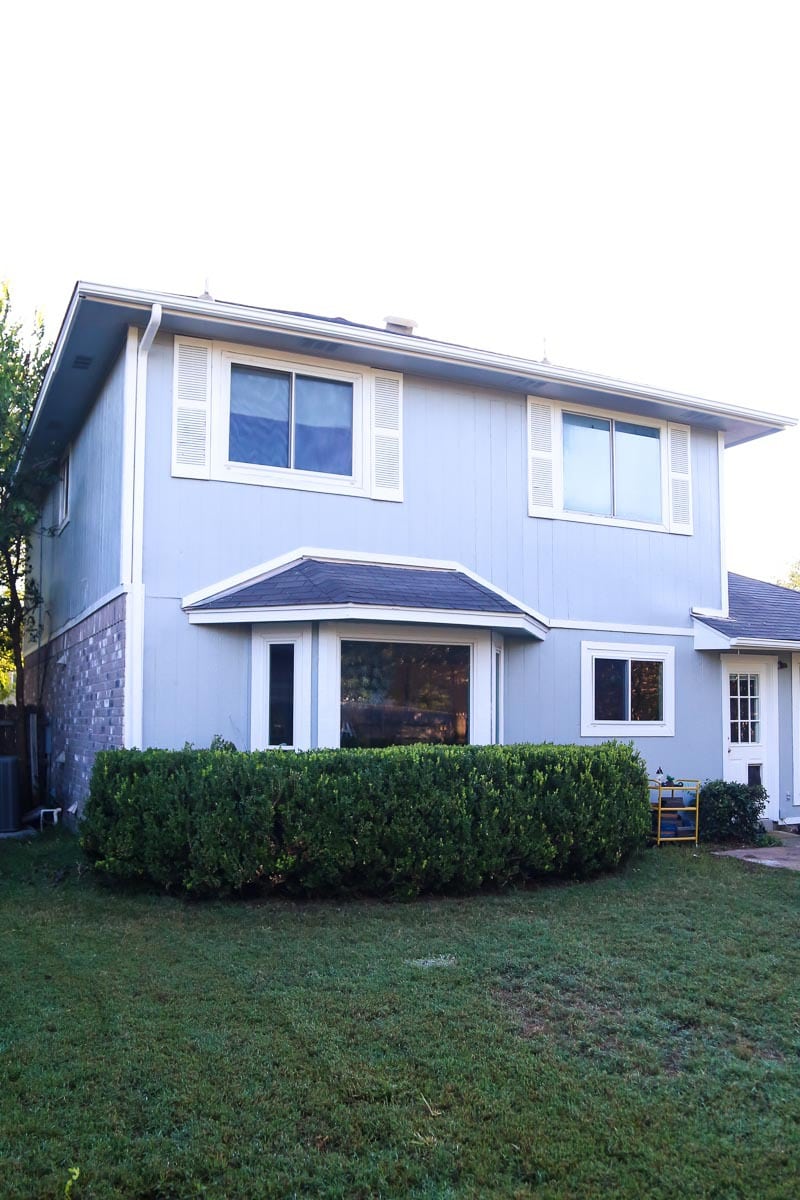
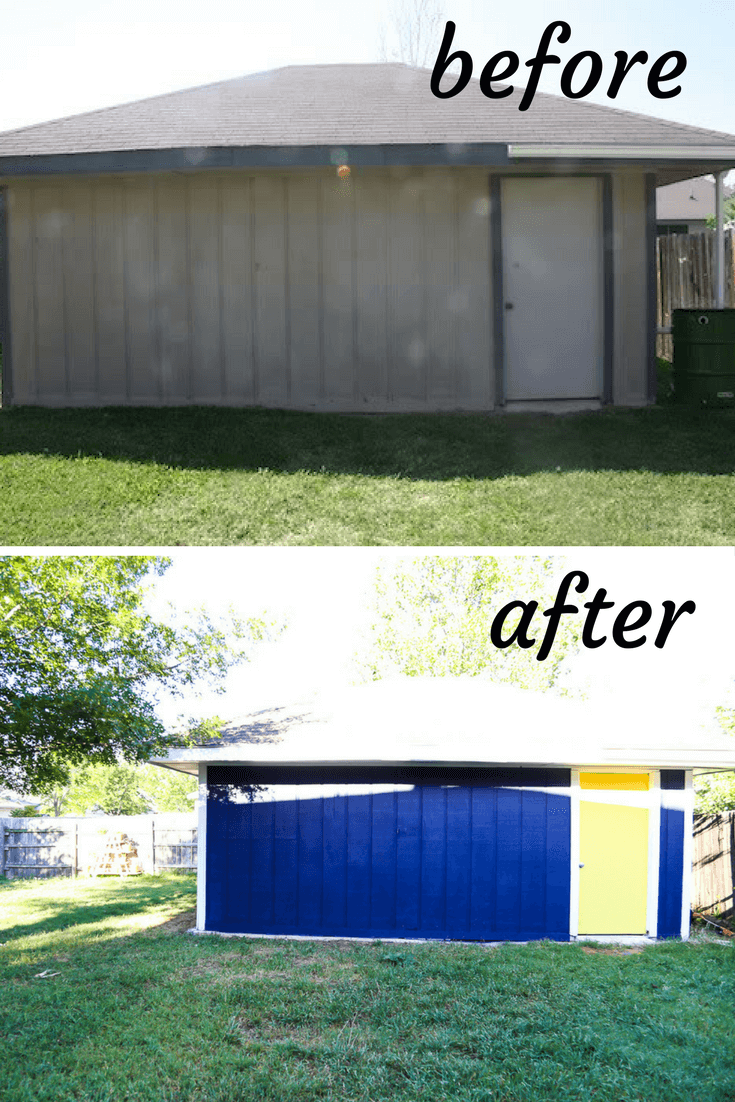
Our home has never been super strong in the curb appeal game. It’s perfectly fine to look at, but the house color was pretty ugly when we moved in (and not in great shape), and we didn’t do anything about it until we decided to move. On top of that, Corey and I spent much more time worrying about the interior of our home than we did the exterior, so not much changed outside throughout the time we lived here.
But, when we finally did get around to having the exterior of our home painted, we were pretty blown away at the transformation. I can’t get over how much better it looks!
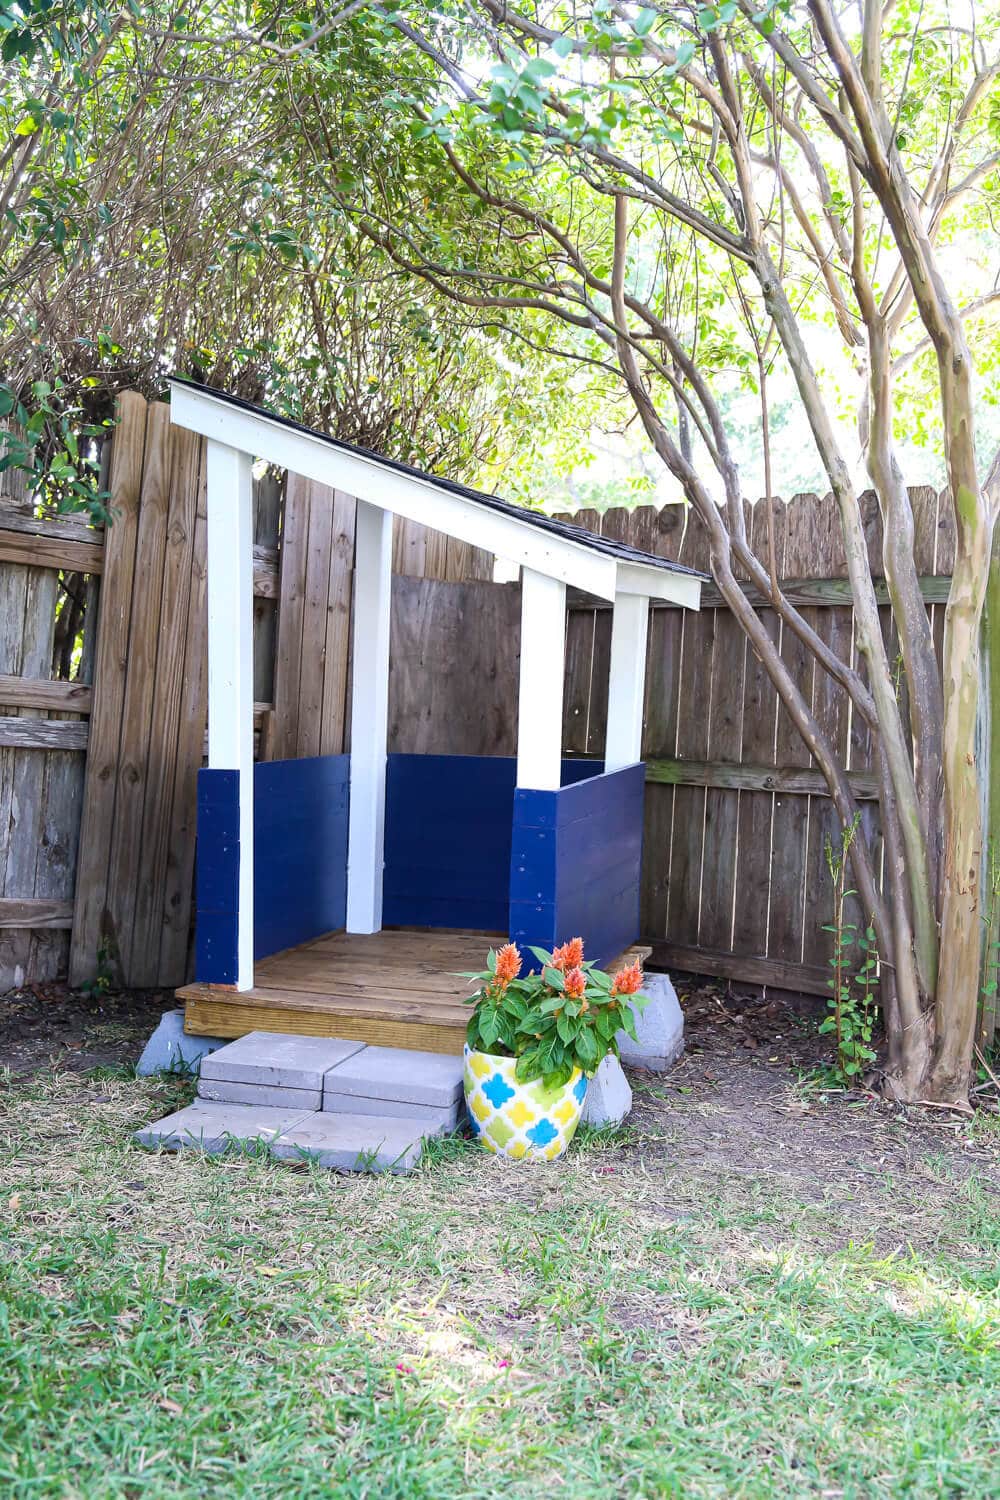
We also made a few minor changes in the backyard – things like adding some pretty furniture, building a playhouse, and sitting back and watching that tree more than double in size.
We might not have done much, but we really have been spoiled by how large our yard is and how much great, functional space we have. Our new yard will be much smaller, but it’s definitely more private than what we have now (we’re currently on a corner lot, and the street we’re next to is one of the main streets for our neighborhood) and we’ll also have a covered patio, which we’re really looking forward to!
Here’s a look at the transformation in our yard:
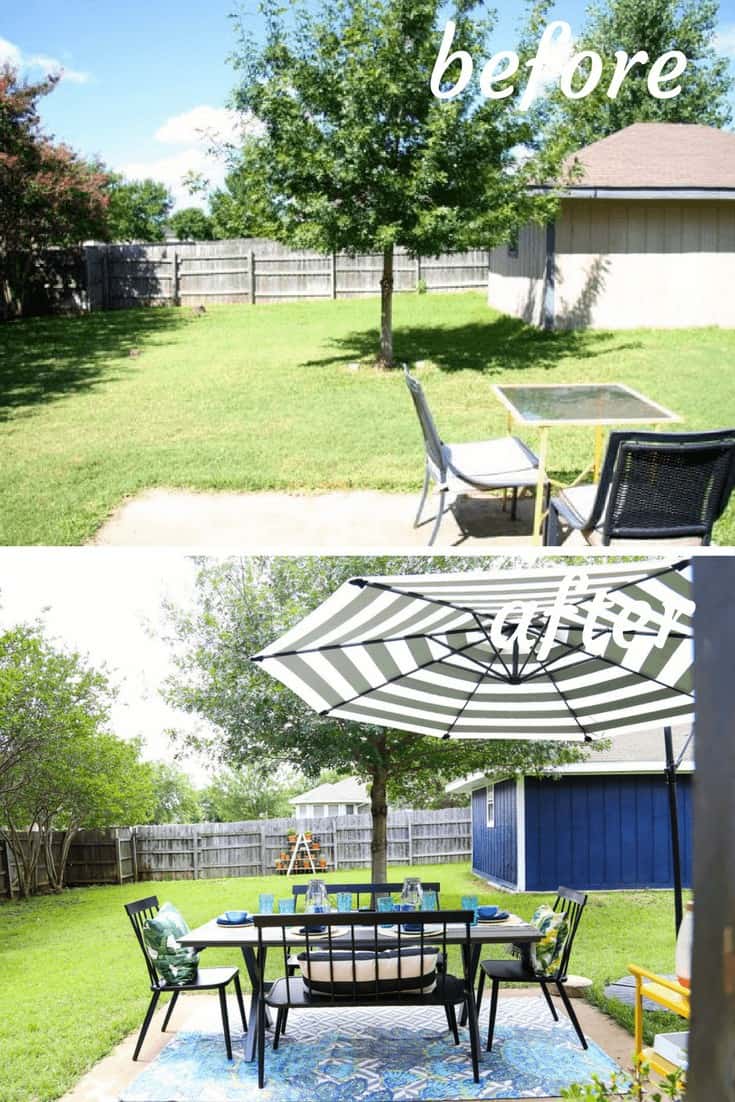
Most of the change that you see happened this year. The people who lived in this home prior to us definitely had green thumbs, and the yard was so well-maintained and gorgeous when we moved in. There were rose bushes, and a whole beautiful bed of flowers on the side of the house. Well, that didn’t last. I’ve come a long way in my gardening skills, but when we first moved in we were awful about taking care of plants, and it all just died. Thankfully, we were able to keep the crepe myrtles on the side of the house alive because they’re a total showstopper.
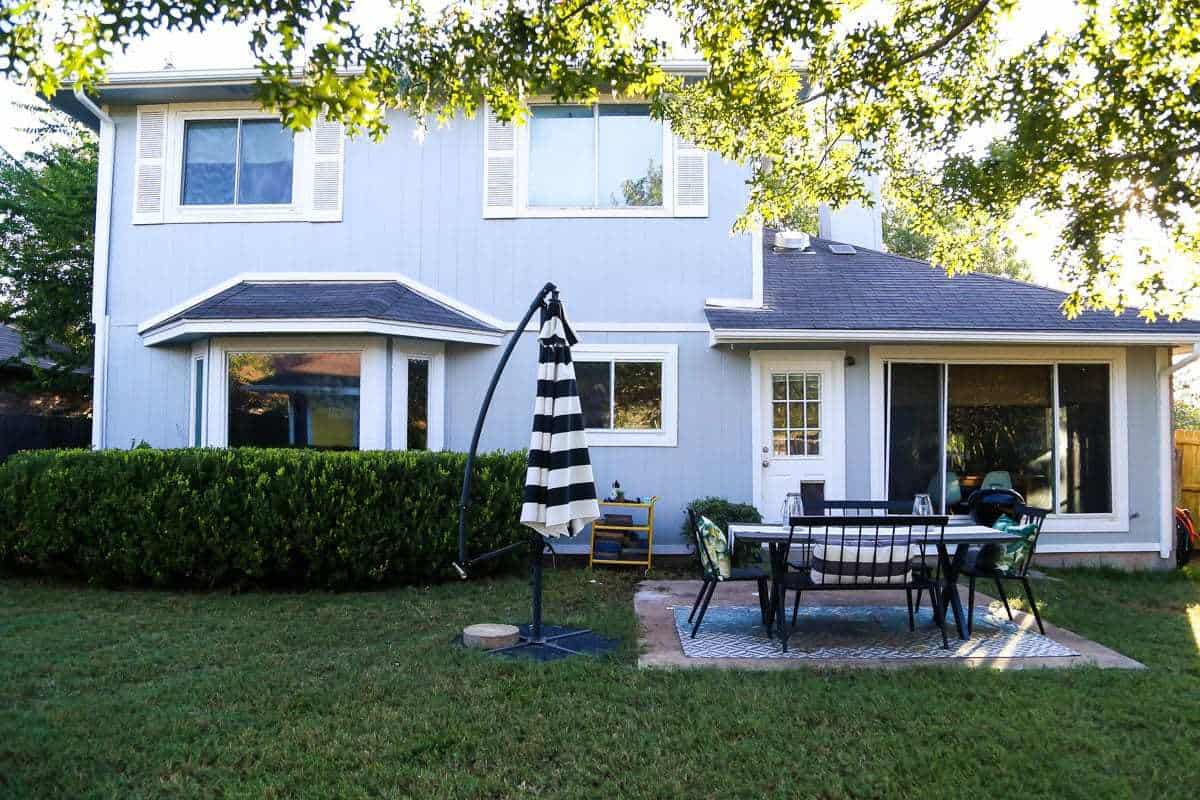
Here are a few more photos of how our backyard is looking now:
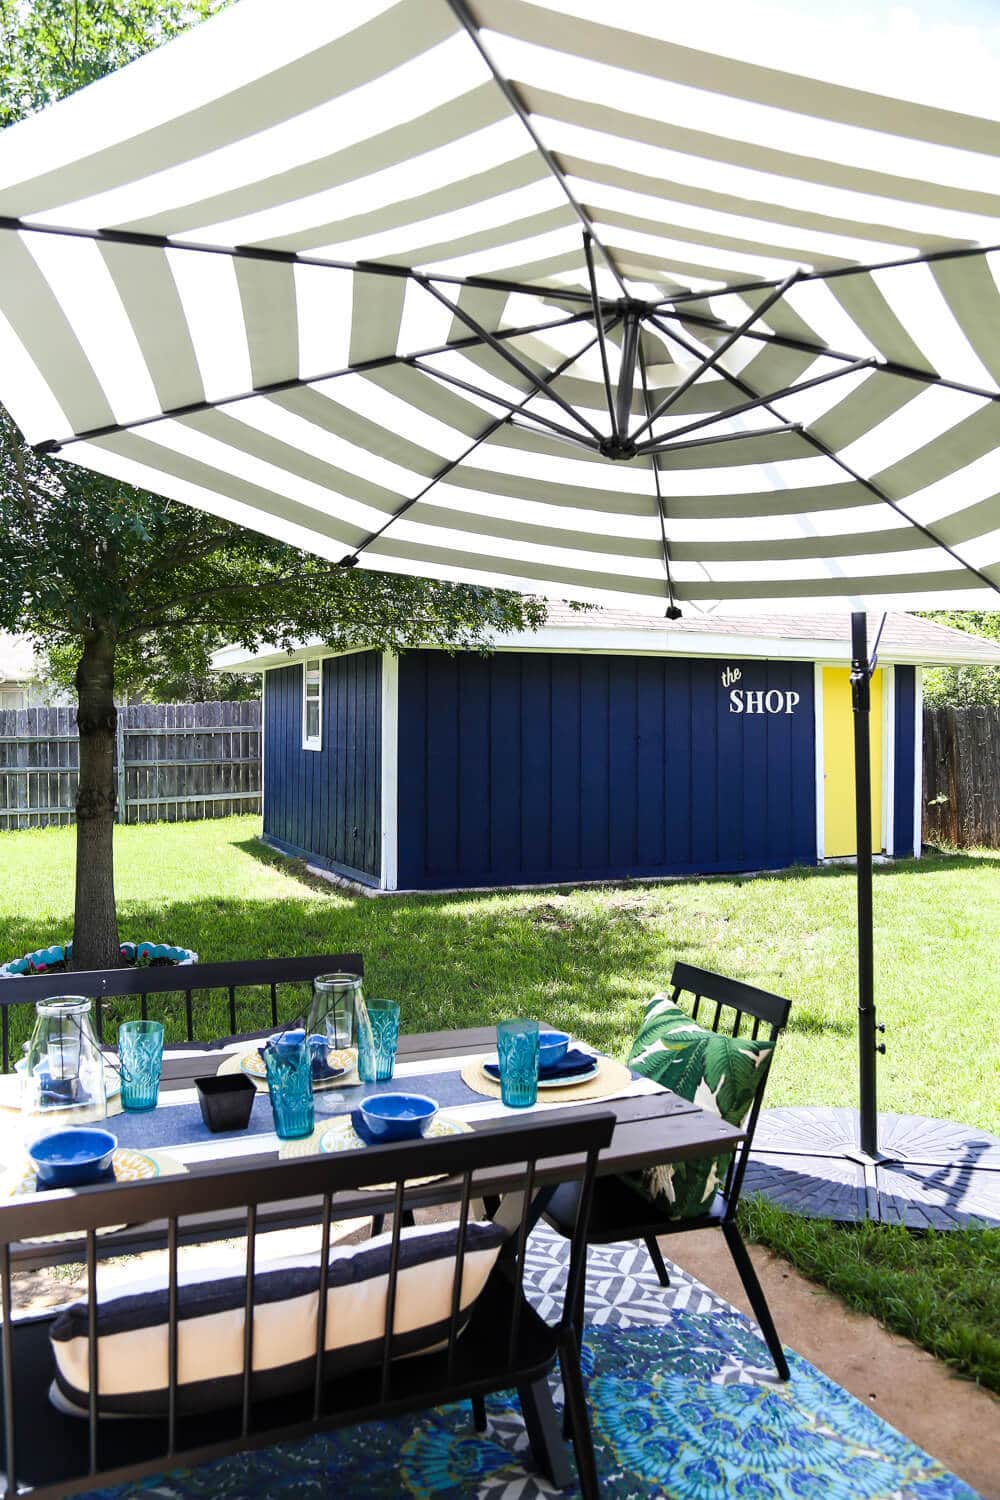
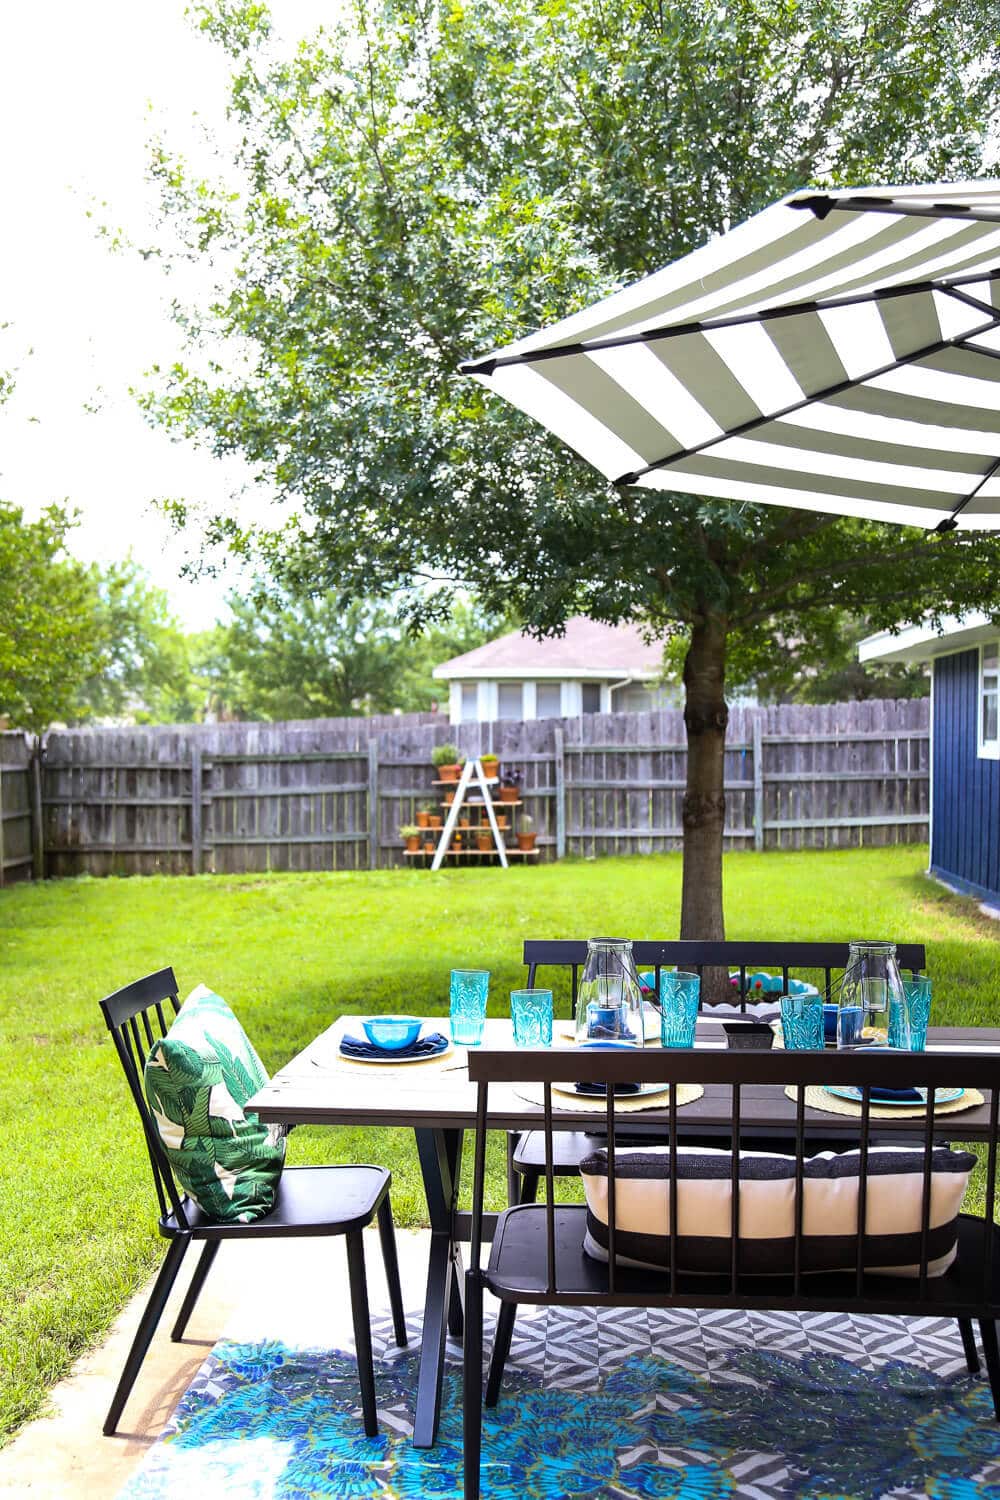
And here are the sources for most of what you see in the backyard:

If you want to read up on any of the backyard projects we’ve done over the years, here are all of the related posts.
Our First Backyard Tour | DIY Backyard Chalkboard | Our Backyard Makeover: The Before | DIY Tiered Ladder Garden | Antique Bar Cart Makeover | Tree Border Garden | DIY Yard Dice | Easy Summer Tablescape | DIY Cinderblock Plant Shelves | DIY Backyard Playhouse | Quick Patio Makeover | DIY Backyard Blocks | Having the House Painted | DIY Lawnmower Shed
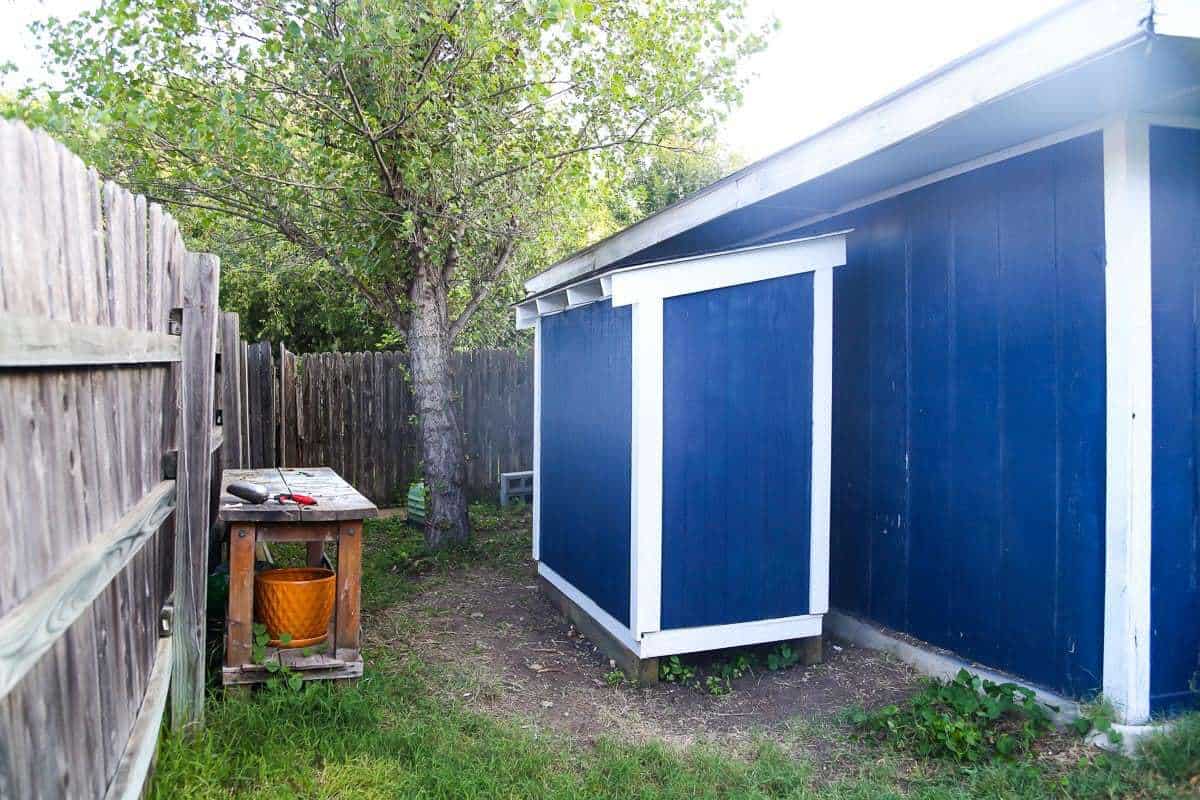
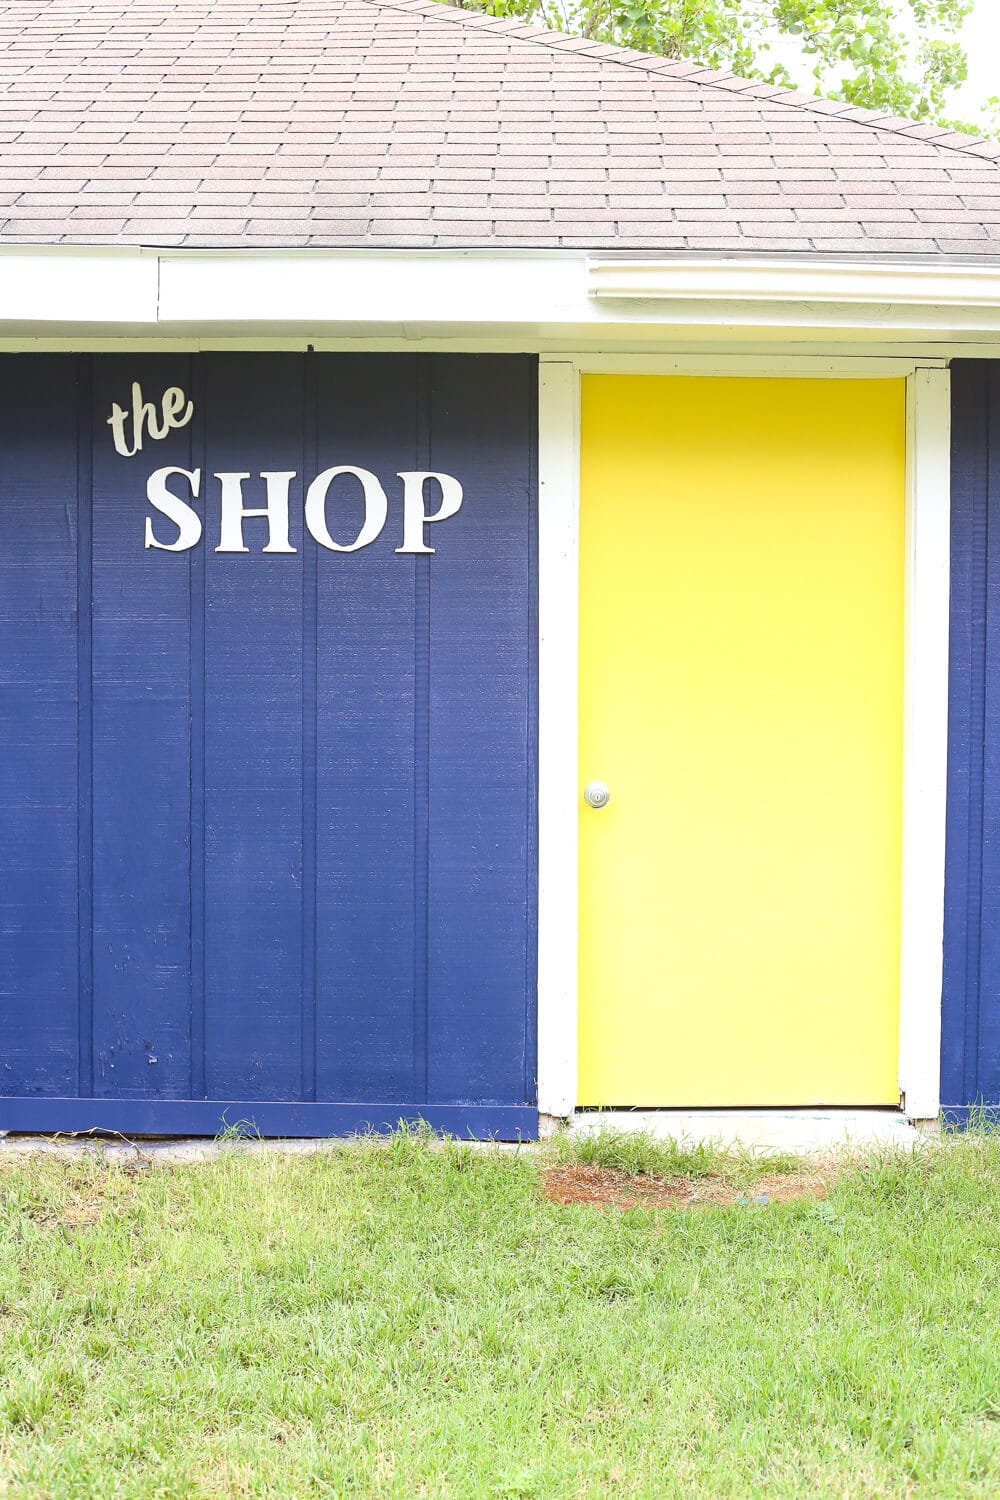
The Workshop – Before & After
I don’t have a ton to say about the workshop, because it’s a space we never really got to where we wanted it to be. It’s a functional space, and we use it on the regular, but it never really became quite as awesome as it has the potential to.
Giving it a fresh coat of paint earlier this year went a long way to making this space look a little more loved and well-maintained. We never realized how much it bothered us to look out on that old, ugly paint color every single day until suddenly it was blue and it made us smile every time we saw it!
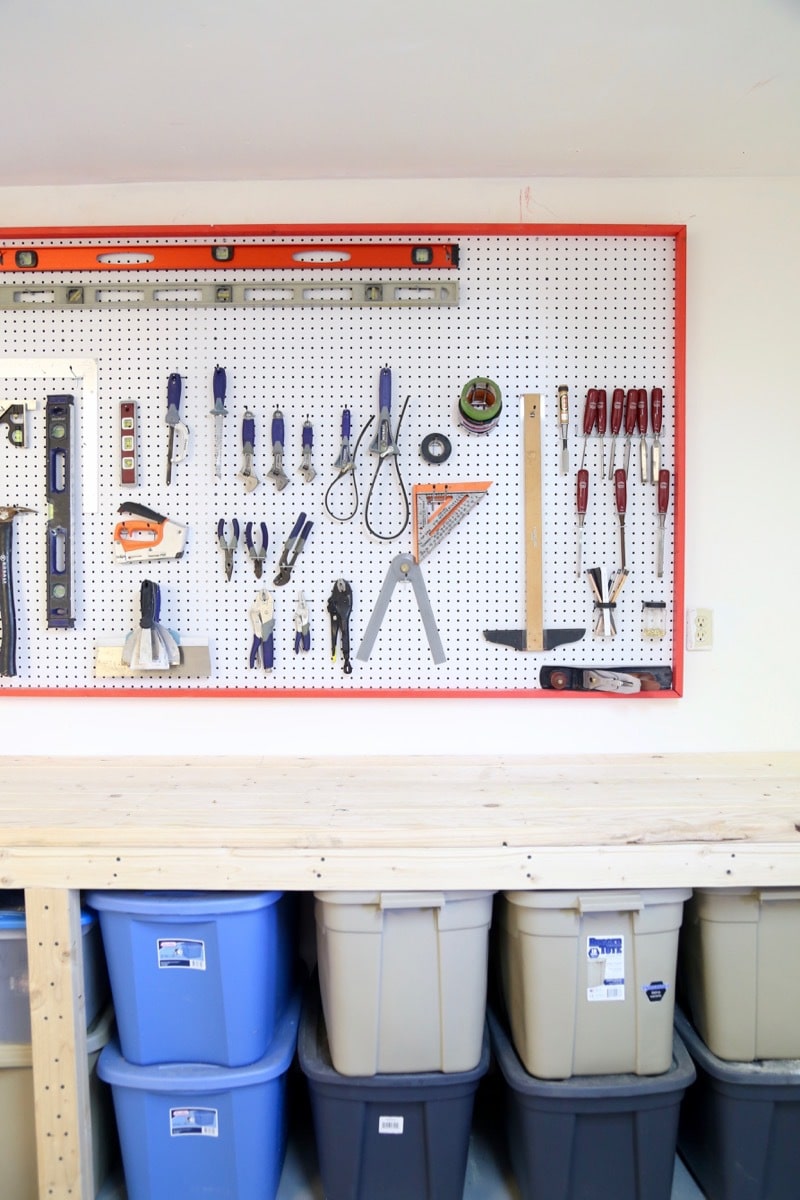
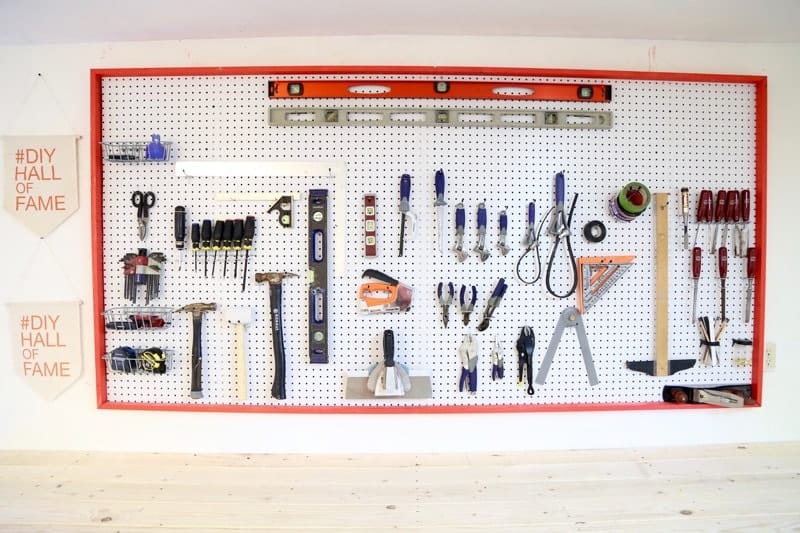
I don’t show the workshop all that much on the blog (because most of the time it’s a total disaster), but here’s a quick compilation of photos to give you an idea of what it looks like when it’s clean:
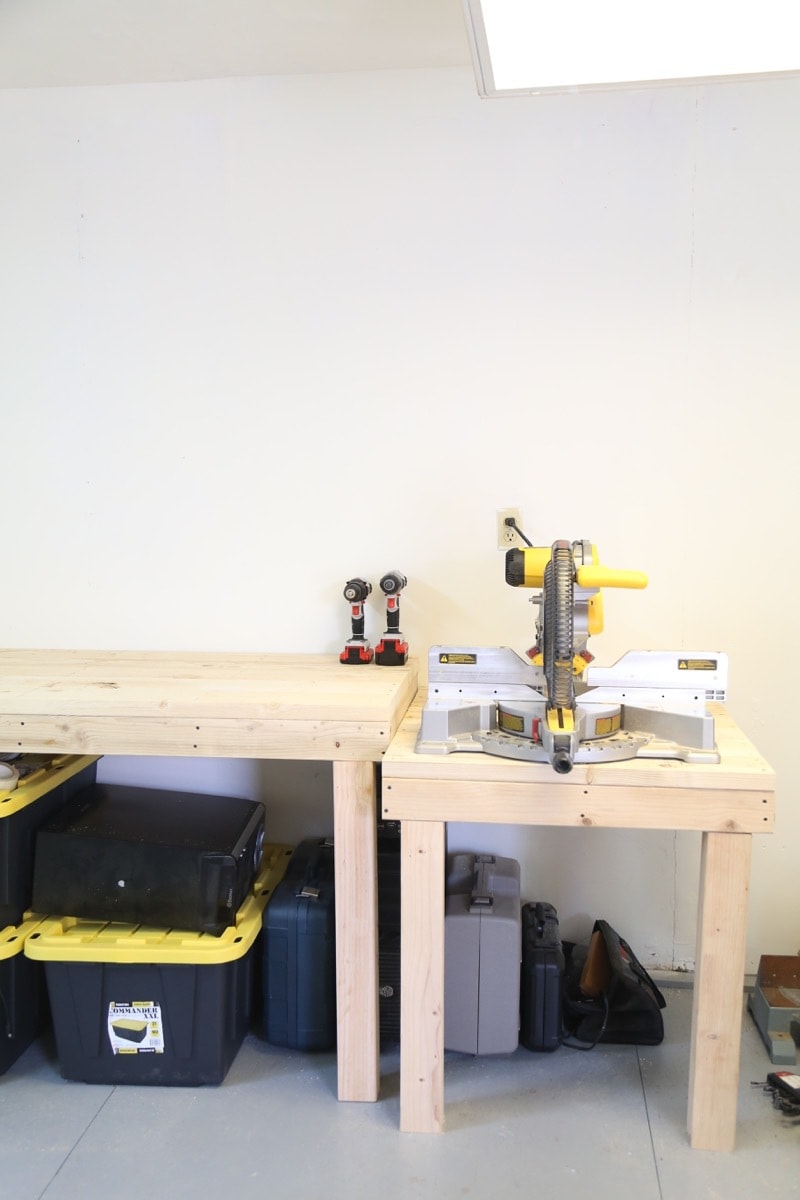
The biggest thing that happened in the workshop was fixing the flooring. When we moved in, we noticed that the middle of the floor seemed to bow up towards the middle (you couldn’t even open the door all the way because it would hit the floor) – it was obvious that it was a poorly-done flooring situation, and we figured we’d get around to fixing it eventually. When we finally did tackle it last summer, it ended up being a pretty massive job. Corey and his dad had to rip out the entire flooring and replace both the supports and the floor itself. It was a ton of work, but it was so worth it – the floor is smooth, easy to walk on, and looks so much cleaner with a fresh coat of paint.
We also added some large workbenches, a huge pegboard, and some open shelving to add some functional storage. We’ll be leaving behind the benches and the pegboard, but we’re bringing the shelves with us to hopefully help us get the workshop in the new house (aka: the garage) all nice and organized. Wish us luck – it’ll be a big job!
Here are all of the posts related to the workshop over the years:
Fixing the Flooring | DIY Workbenches | Giant DIY Pegboard | Painting the Workshop | DIY Workshop Sign
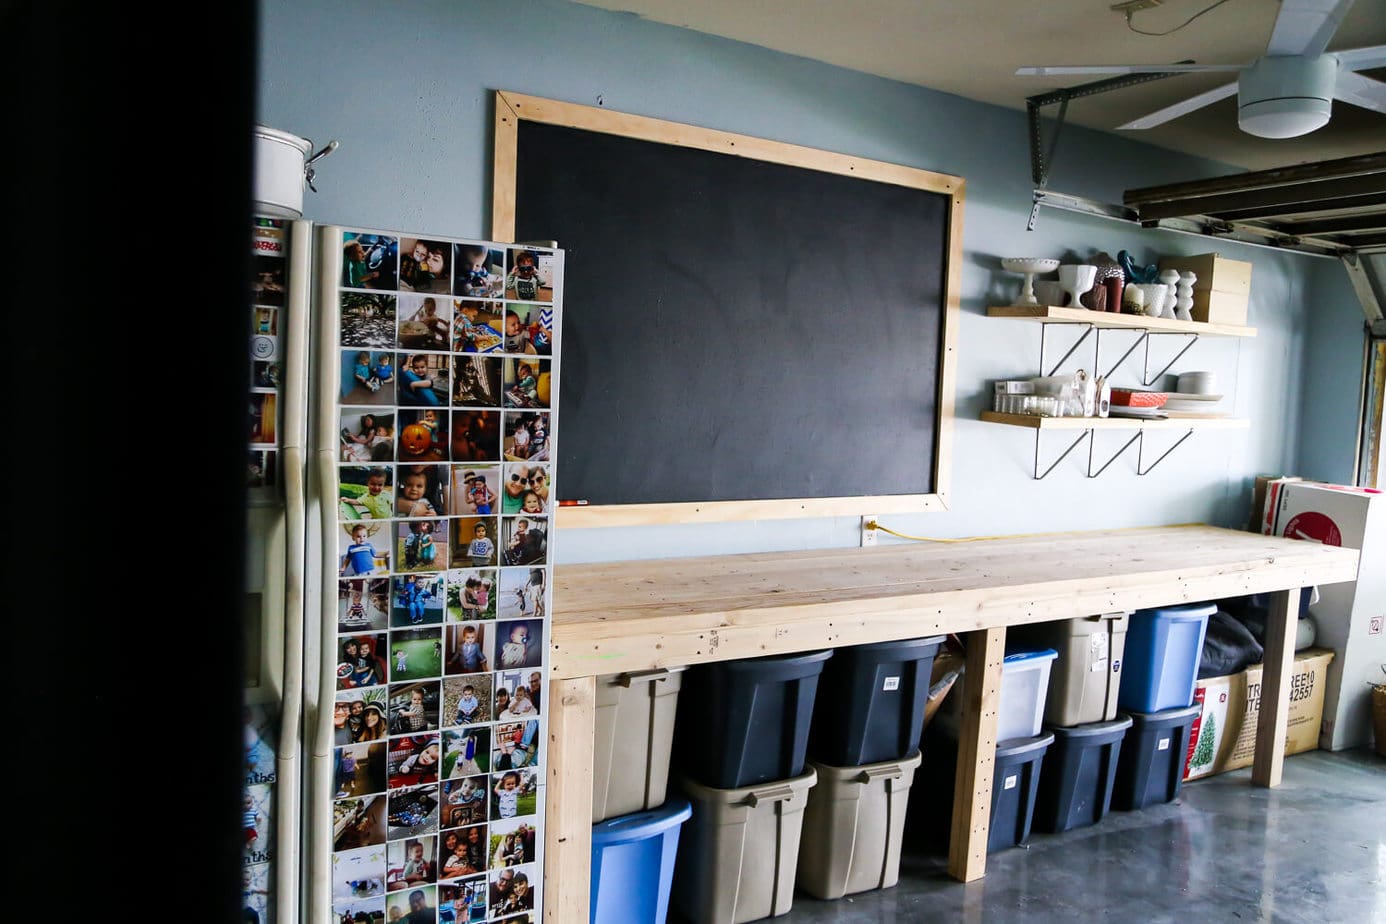
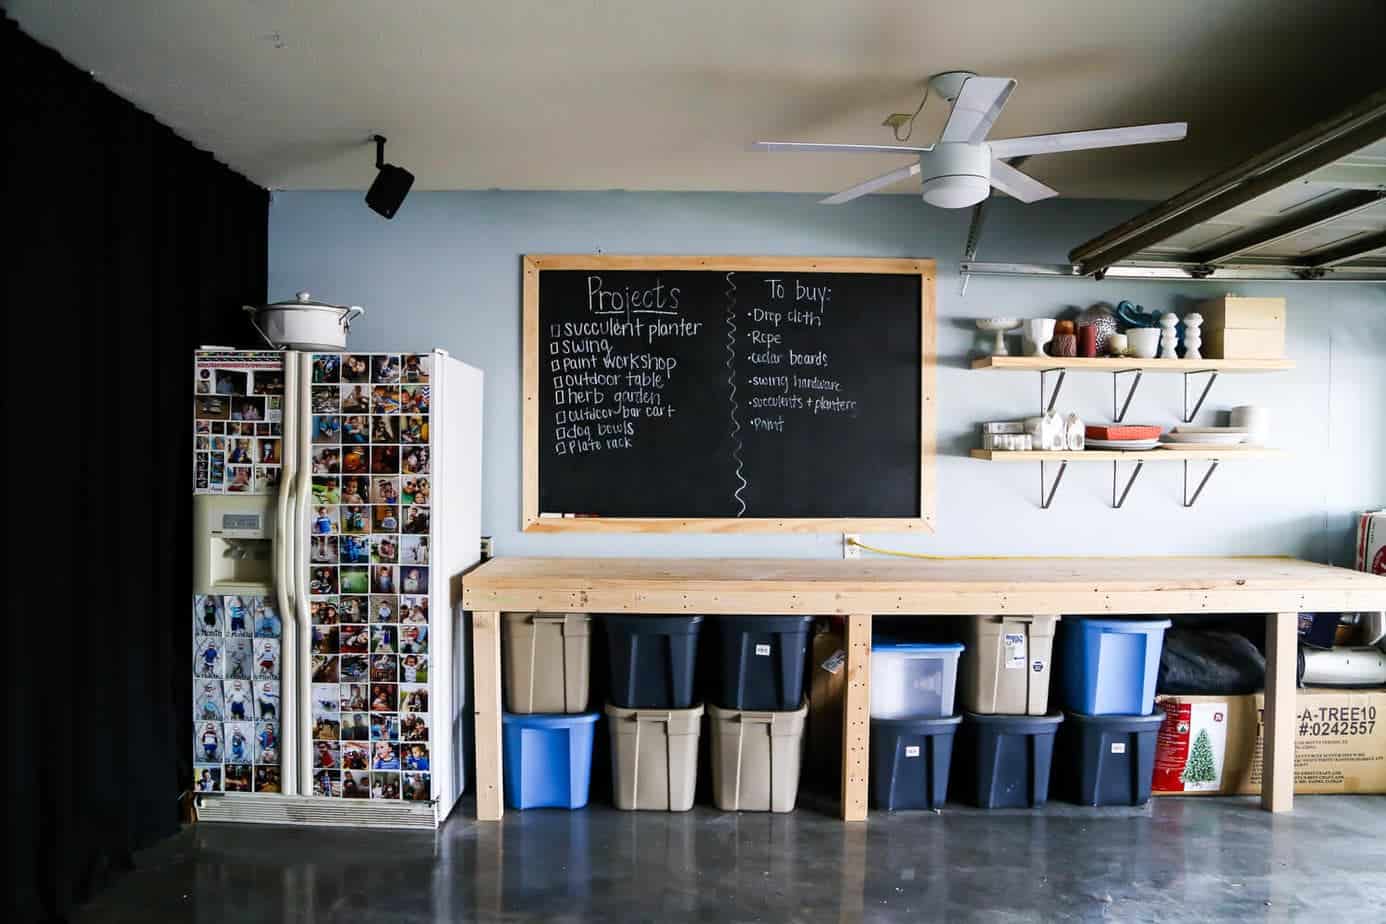
The Garage – Before & After
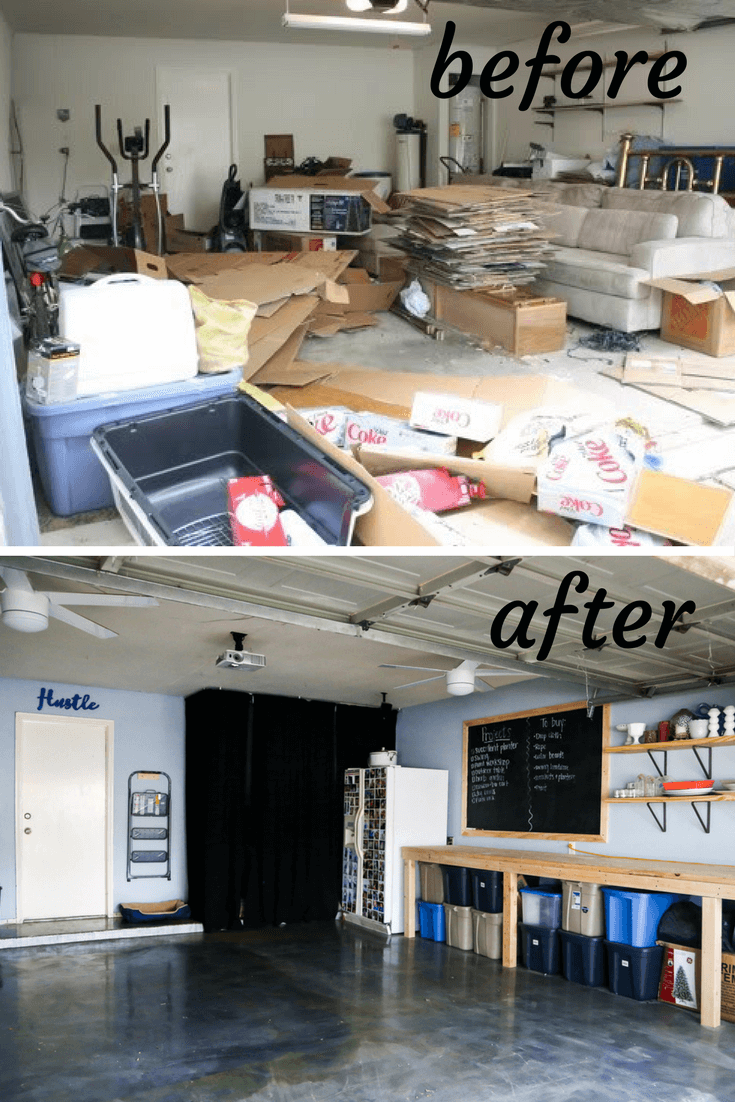
The garage has been through its fair share of ups and downs over the years. As you’ll see below, it went from garage to media room and back to garage over the course of just 6 years. This poor little room definitely has an identity crisis.
The reason behind all of the transformations is long (and you can read about it in the links below), but in the end we’re actually happy with where it ended up. We’ve learned that as nice as it is to have a workshop in the backyard, we both actually prefer working in the garage since it’s so much more convenient. It’s also really nice to be able to open up the garage door and let the breeze flow in (and it’s easier to watch Jackson through the big opening in the garage than the tiny workshop window!). Now that we know how we both function best, we’re looking forward to setting things up right the first time in the new house.
Here’s how the garage changed throughout our time here:
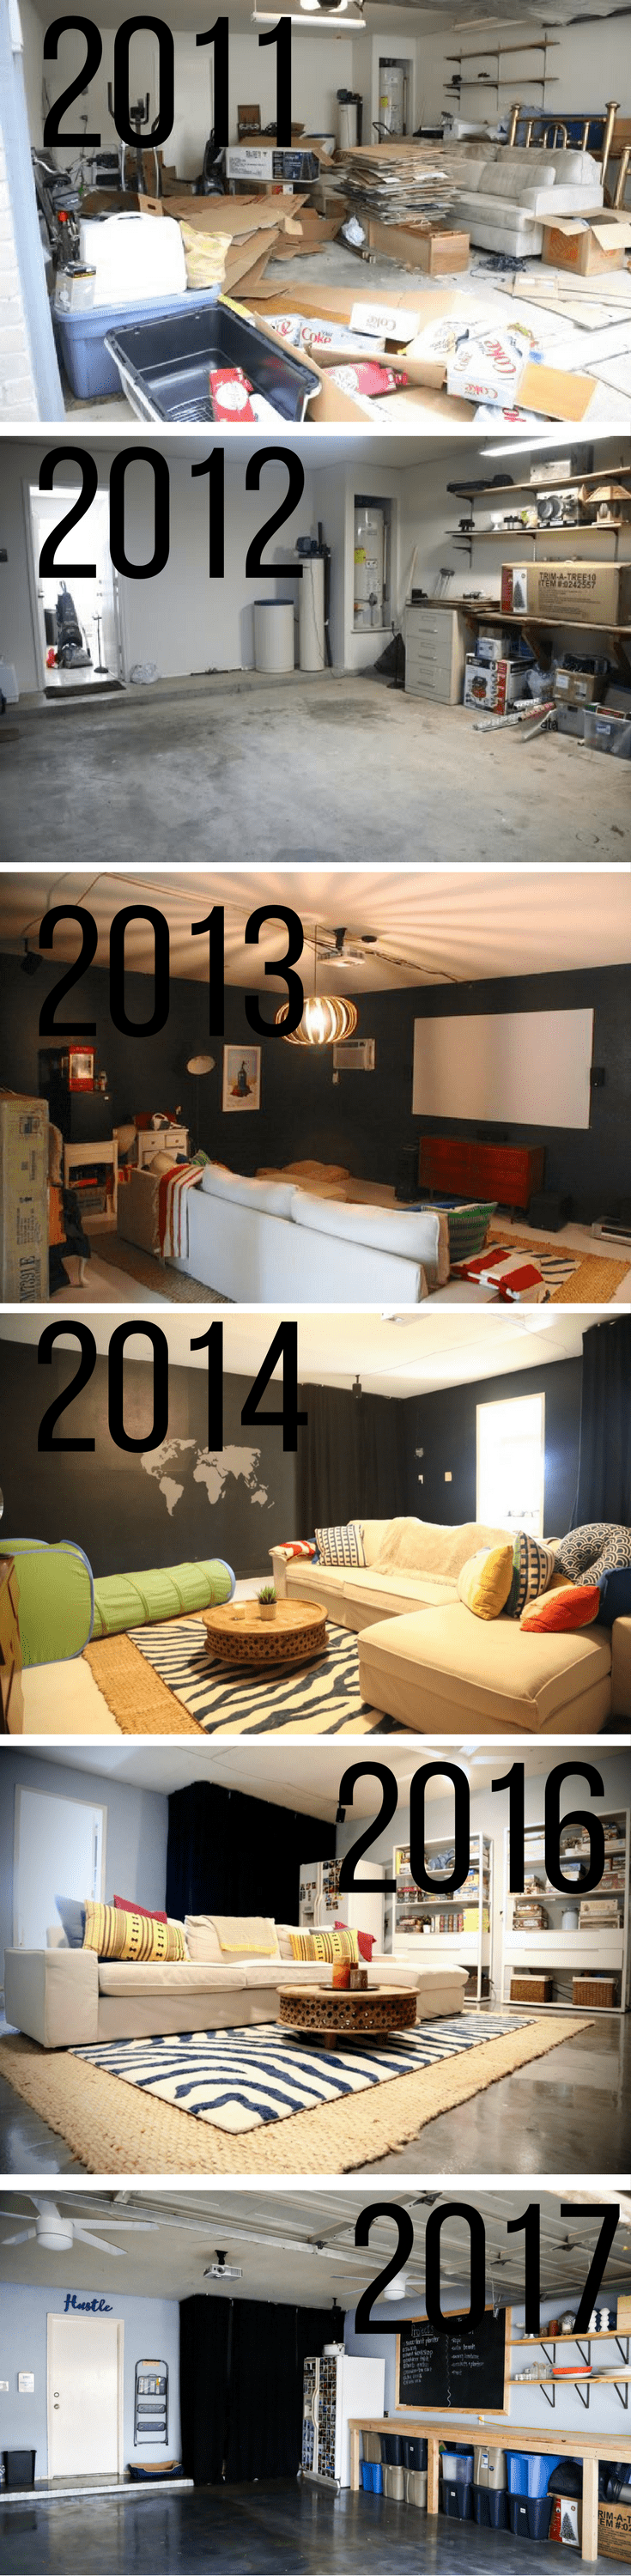
Whew. Hard to keep up, right?!
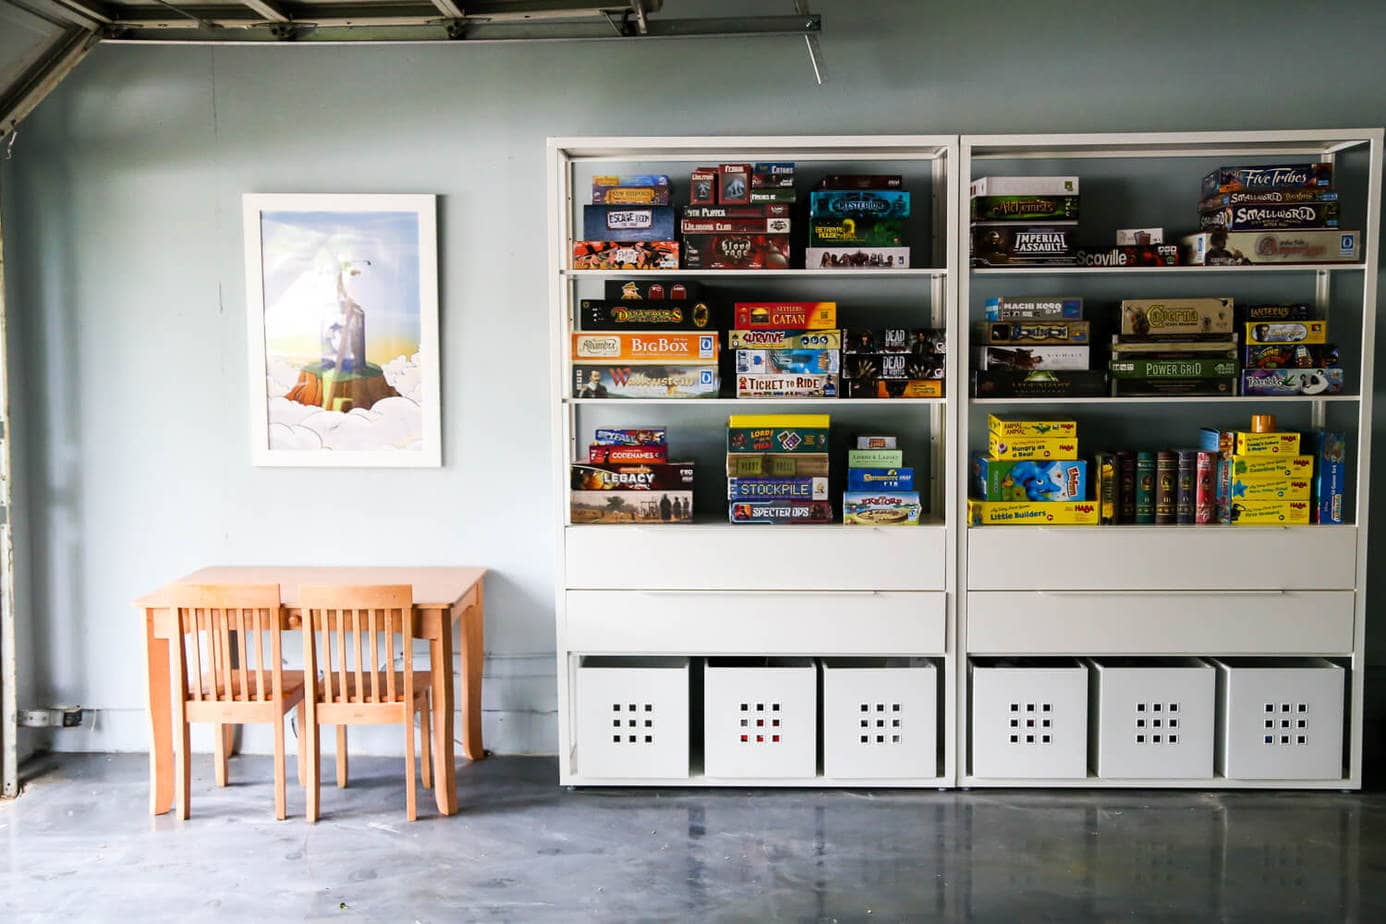
I do miss having the extra media room space – it was always so cozy in there, and we basically had our own movie theater – but it just wasn’t meant to be. Here are a few more shots of how our garage looks right now – I really love how organized it is, and how easy it is to work in here. I’m hoping we can keep the same hyper-organized and functional feel in the new house, too!
You can read the entire journey below – I’ll link to all of the garage-related posts throughout our time here:
Organizing the Garage: Year 1 | Organizing the Garage: Year 2 | Building a Wall in the Garage | Painted Concrete Floor | Choosing Furniture for the Media Room | Adding Curtains | Why You Need Two Refrigerators | A Confession About the Garage | RockSolid Garage Makeover | Why We Had to Un-Convert the Garage | Garage Renovation Reveal | DIY Giant Chalkboard | Organizing the Garage Nook
And just like that…we’re done.
I hope you’ve enjoyed following along as we’ve recapped all of the changes we made to this house in the time we lived here. I can’t believe it’s actually time to leave! Corey and I have been packing like crazy and we’re going to begin moving into the new house this weekend! If you want to follow along, be sure to keep up with my Instagram Stories, because I’m sure I’ll be sharing some sneak peeks there!
Next week is Thanksgiving, and I’ll try to check in a few times but don’t expect any big news from me until after the holiday is over. But, I promise you, as soon as things are settled down I’ll be back with tons of photos of the new house!
Wish us luck!